
With the prices of BMW E9X M3 reaching affordable levels, it’s no surprise the M-powered legend doesn’t last long on the second-hand market. When you can pick a 414hp high-strung V8 powered luxury sports compact with no compromise to reliability and quality or a thirty-year-old Nissan with no parts availability and half the horsepower, it’s a pretty easy choice to make unless you just have to live the sadboi JDM life (looking at you, R32 GTR.) What the E9X M3 offers out of the box is nothing short of astounding, especially with the availability it has achieved in recent years. That said, it is now becoming popular among tuners who want to improve the handling and performance of the already impressive M3. Sometimes, though, the improvements like lowering the suspension include unforeseen side-effects. Like road hazards. If you want to keep your M3 safe, you need a skid plate. This is what you need to know to install the Turner Motorsport E9X M3 Skid Plate, which we think is your safest option.
Before you begin, though, check out this helpful video where I explain the full installation step-by-step over at Turner Motorsport:
Section 1: Removing the OEM Insulation Panels
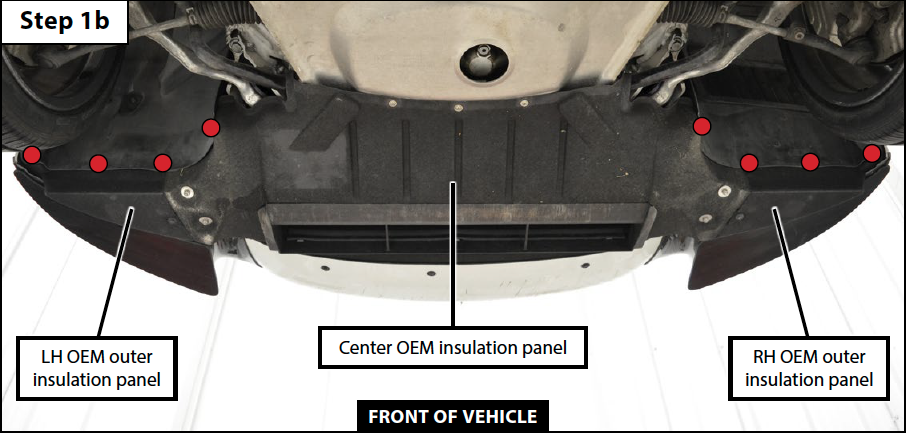
Step 1
• Remove all nineteen of the 8mm screws which are highlighted in the photos below in red.
• Remove the three 4mm hex (allen) screws which are highlighted in the photo below in yellow.
– Do not attempt to loosen or remove the 10mm hex nuts which protrude from the center insulation panel, these secure the center insulation panel support cables and cannot be removed.
• Leave the center insulation panel hanging in place while you remove the two outer insulation panels.
- These outer panels come out easily by pulling them downward and toward the center of the vehicle.

Step 2
• Release the LH center insulation panel support cable from the chassis bracket.
- Rotate the cable anchor 90º in either direction.

Step 3
• Slide the anchor toward the front of the vehicle, then pull it downward and out of the chassis bracket.
- Repeat this process to release the RH support cable from the chassis bracket.

Step 4
• Remove the center insulation panel from the vehicle.

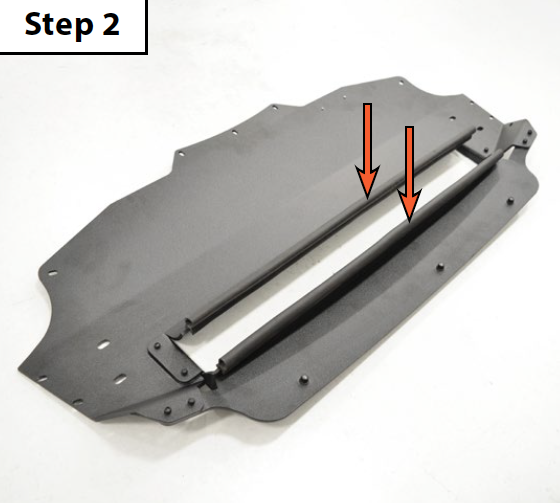
Section 2: Installing the New Skid Plate Kit
Step 1
• Remove the two bulb seals from the OEM center insulation panel.

Step 2
• Install the two bulb seals onto the new center skid plate.
Step 3
• Locate and identify the hole in the LH side of the chassis which is shown in the Step 3 photo below.
• The skid plate kit includes two frame nuts which are designed to be installed in these chassis holes (one of each side).
- Proceed to step 4 for the installation procedure.

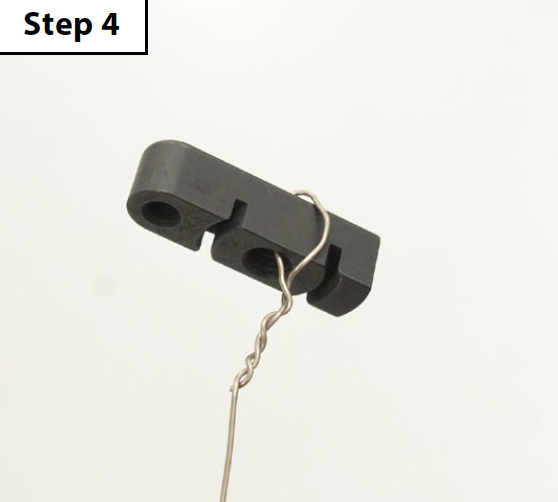
Step 4
• Prep the frame nut for install by securing a length of safety wire or string through the center hole.
- This is to help guide the frame nut into place, and also to retrieve it if it is dropped during install.
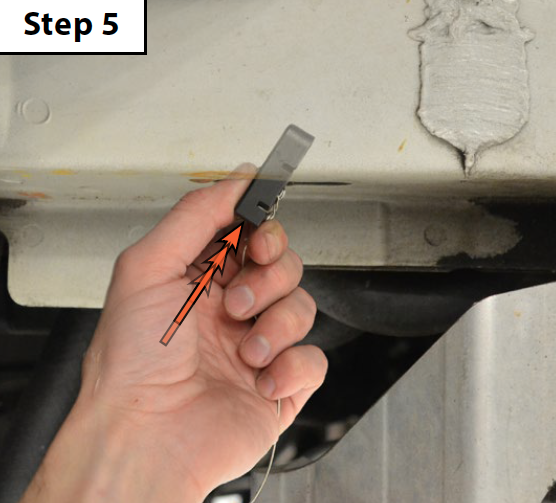
Step 5
• Slide the frame nut through the LH chassis hole as shown.
– Ensure that the rounded end of the frame nut is inserted first, this end contains the M6 threads which will be used to secure the frame nut to the chassis.
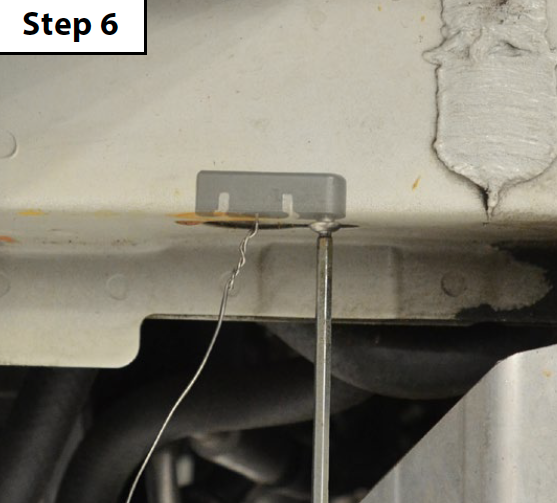
Step 6
• Apply a single drop of blue loctite to the M6x10mm screw (optional).
- Line up the screw with the rearmost threads in the frame nut and tighten it to 8 Nm (6 Ft-lbs).
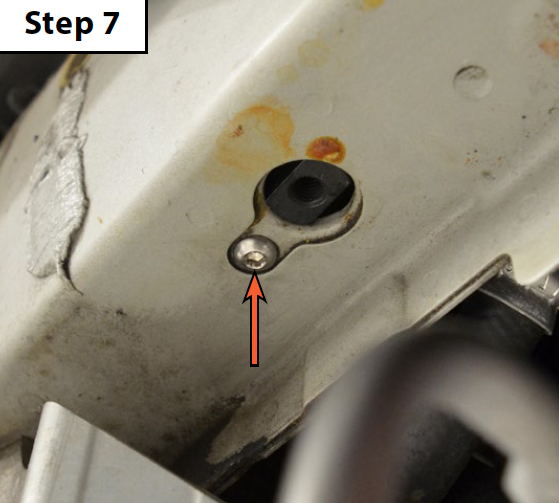
Step 7
• Repeat this process to install the other frame nut into the RH chassis hole.
- Remove the wire or string used to secure the frame nut.
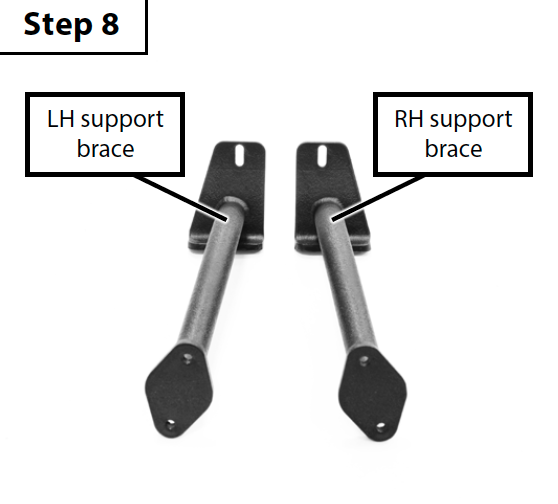
Step 8
• Use the Step 8 photo below to identify the LH support brace from the RH support brace.
- These braces are side specific and will only fit one way.
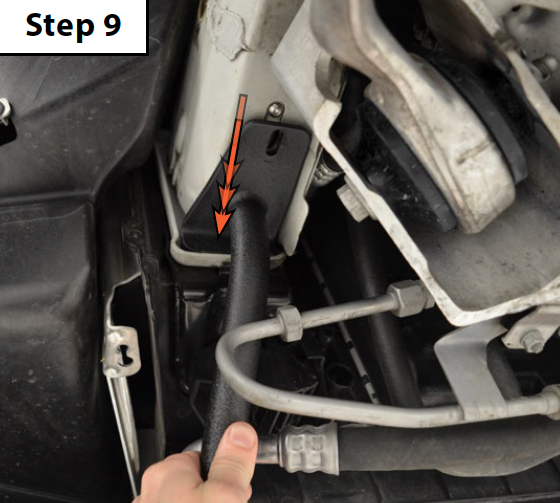
Step 9
• Slide the LH support brace into position in the chassis as shown.
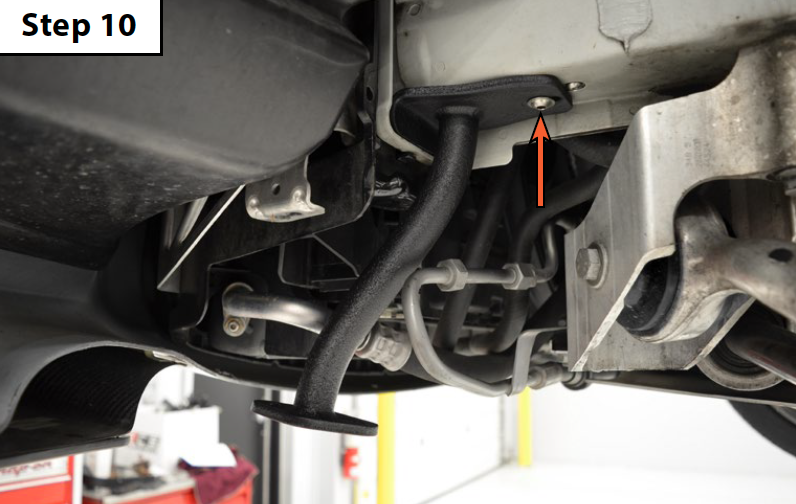
Step 10
• Thread one of the M8x25mm screws through the LH support brace and into the threads in the frame nut,
then torque it to 15 Nm (11 Ft-lbs).
- Repeat this process to install the RH support brace.
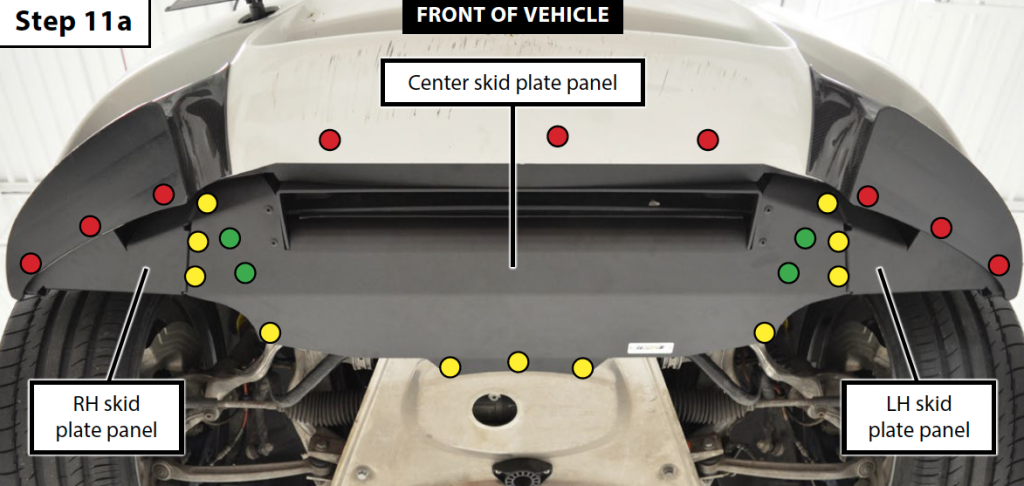
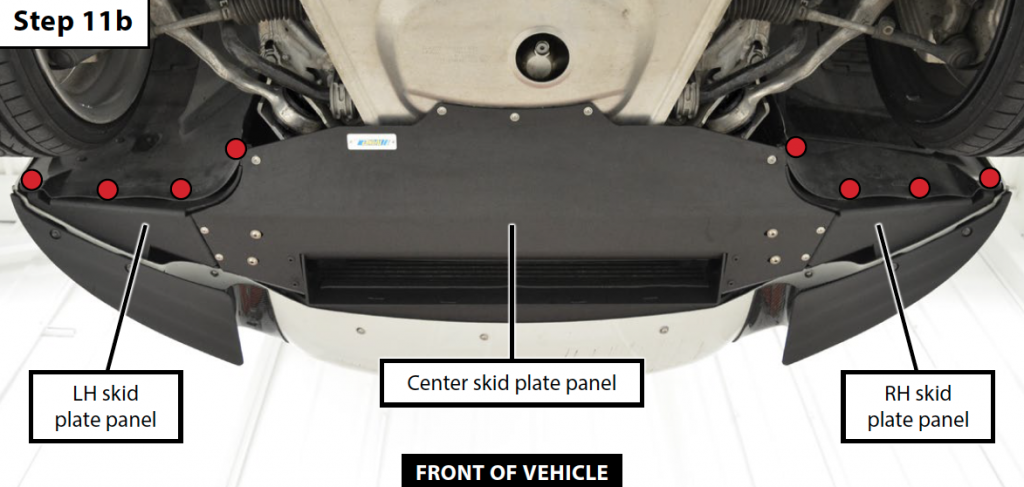
Step 11
• Using the two photos below for reference, install the LH and RH skid plate panels loosely into place.
• Using the two photos below for reference, install the center skid plate panel loosely into place.
– M6x16mm Screws = Red (QTY 17)
– M6x20mm Screws = Yellow (QTY 11)
– M8x25mm Screws = Green (QTY 4)
- Adjust the skid plates as needed for proper fitment, then hand tighten all of the fasteners.
With that, you now have a much more protected E9X M3. No more worrying about road debris damaging your steering rack, oil cooler, lines, or radiator that hang dangerously low for the lack of protection the factory splash guard offered.
Related Article: How To Add 50hp To Your BMW E92 M3

Related Article: Best Visual Upgrades For Your BMW E92 M3

Related Article: Common Problems With The BMW E92 M3


