If you’re like me, you drive a convertible on nice days. If you are even more like me, you avoid driving on rainy days since it tends to rain more inside the car than outside. This is, of course, thanks to a convertible top littered with pinholes and barely sealed around the windows. Nothing is worse than sitting in traffic with water pouring down your face, I can tell you from experience. So, I stopped driving my vert almost altogether as a result. Well, procrastination be damned, I decided to do something about it and replace the top myself. This is where I found there to be almost no consistent information or a solid step-by-step DIY all in one place. So, I gathered resources, asked damn-near everyone I knew who had attempted a top replacement and set to work with the intention of bringing the E30 community an entire set of instructions. This is your long-awaited E30 Vert Top Replacement DIY. Get excited.
Now, some of this information will be universal. If you have a Z3, Z4, Miata, VW Cabrio, or any number of compact verts, several key pieces of information you will have trouble finding, if you can find them at all, are here in this guide. So grab your trim tools, a lot of adhesive, a bottle of your favorite hooch and let’s get started.
To begin, I’d like to offer some introductory advice. Here are the biggest things you need to know or need to have in order to replace your convertible top.
Items to Have:
Lots of latex gloves
Loctite 300 Spray Adhesive (Silver label) – 2 cans
Goof-off (or your favorite industrial adhesive remover)
Anti-seize like PB Blaster
Silicone lubricant
Plenty of shop towels
At least 10 microfiber towels
A course-bristled brush you don’t mind throwing away when you’re done
A set of trim tools – Schwaben Trim Tools found here
Sikaflex 221 Auto/Marine Seam Sealer/Adhesive
Caulk Gun
5/32” Rivets
Professional Rivet Gun
Drill and bits
Four locking vice grips
Dremel tool
Drop cloths (i used 3 5×10 sheets)
Foam blocks
Something to set on your trunk that can hold the rear of the top up off the deck (i used a Schwaben wheel jack stand)
Frosty beverages (seriously, take your time and have a drink. There is more downtime where you just have to sit and watch glue dry than you will want to watch while thirsty).
TAKE PICTURES OF EVERYTHING since sometimes you forget what goes where
Attitudes to Have:
Patience
Confidence
Commitment
Patience (again)
My Resources:
I found a few original BMW repair guide videos buried on YouTube that display almost everything you need to know, but a lot is left to your imagination. Watch these videos before you begin and reference them alongside this guide throughout your project. I will link them here:
After watching the educational videos, let’s begin!
Start with your top unfastened from the A-pillar mounts as if you were going to lower the top.
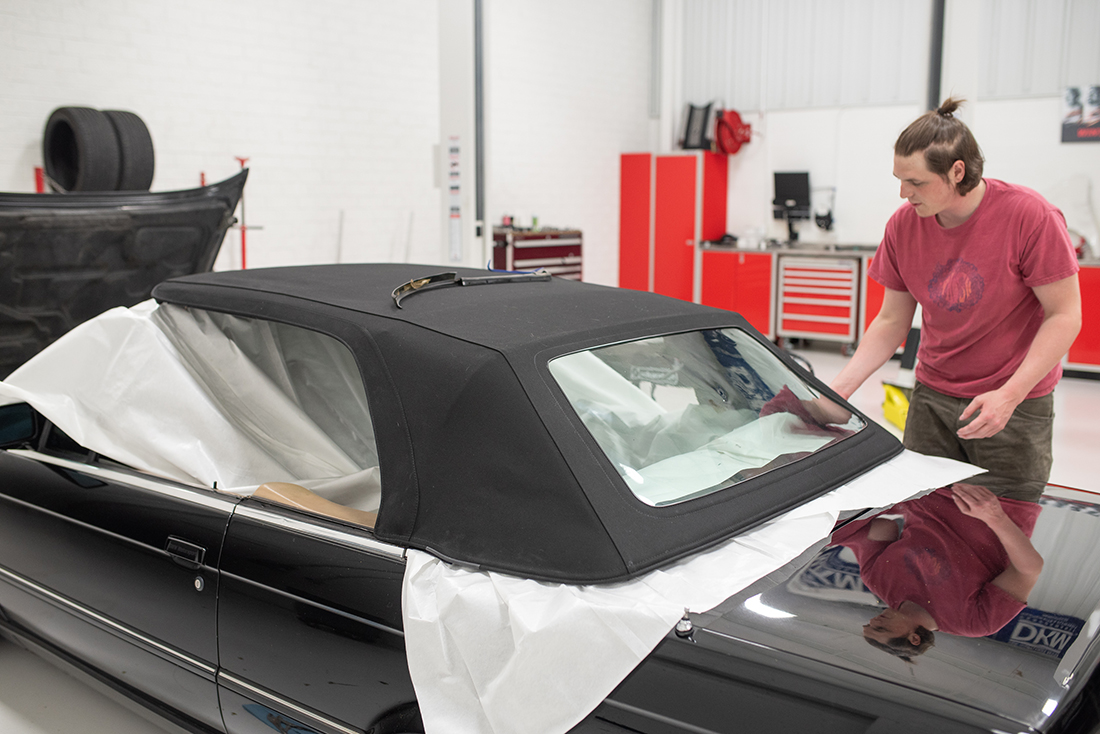
Place your drop cloths down over the interior. It will be helpful if you remove your interior, though I did not. Learn from my mistakes. Take your front and rear seats out. You need the room.
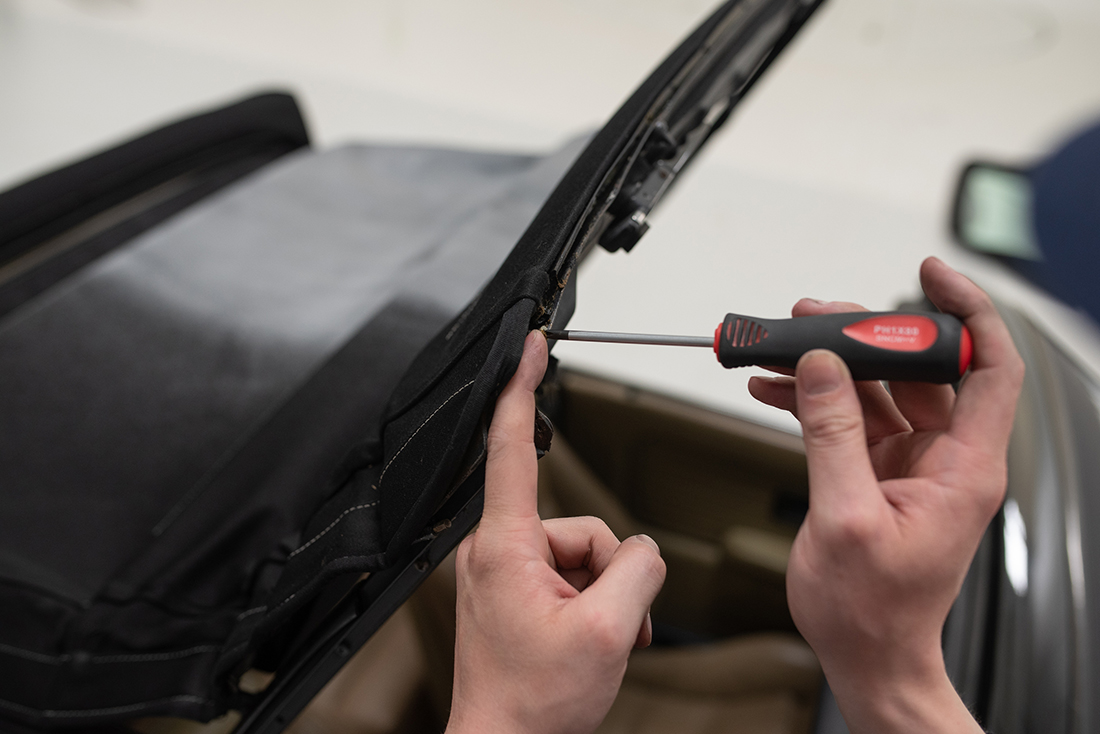
Begin removing the seals. If you are doing this on a budget like me, you will reuse these unless they are absolutely shot. New seals can be found here on ECS Tuning’s site. CAREFULLY peel the trim out of the convertible top rails. There are a front seal, side seals, and a rear seal under the window where it meets the deck when in its closed position. If any rubber, glue, or debris is left inside the rails, you need to thoroughly clean them so there is NOTHING left inside the rails. You will not be able to slide the seals back in place if they are not perfectly clean.
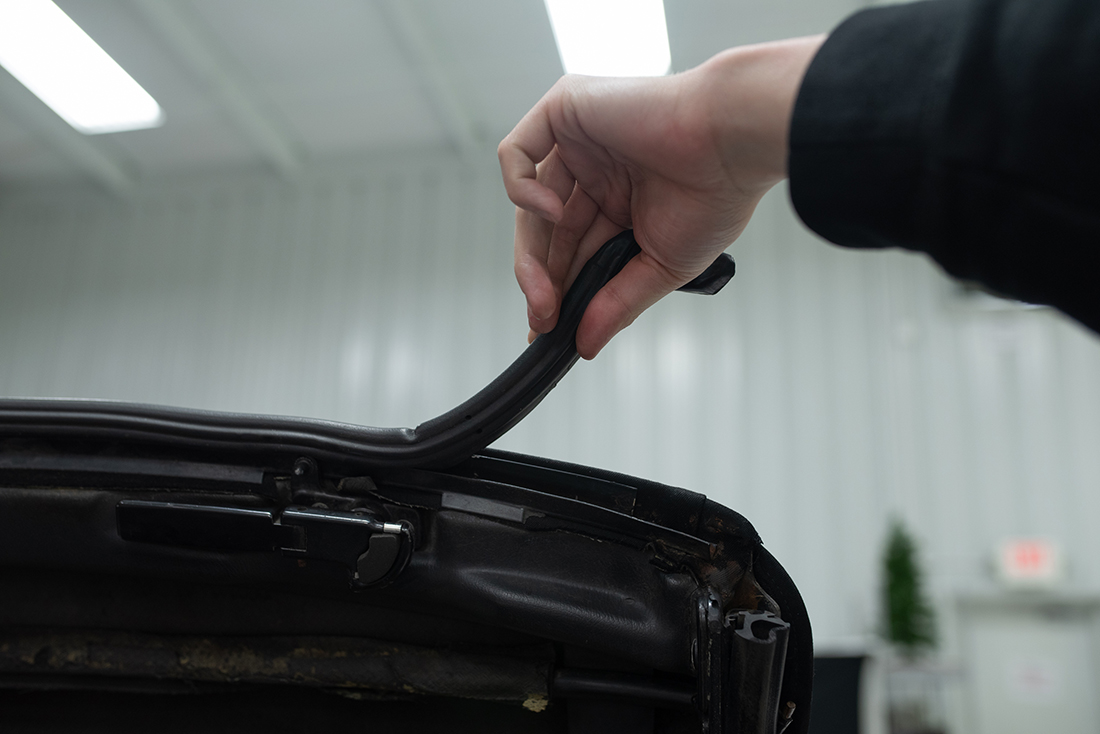

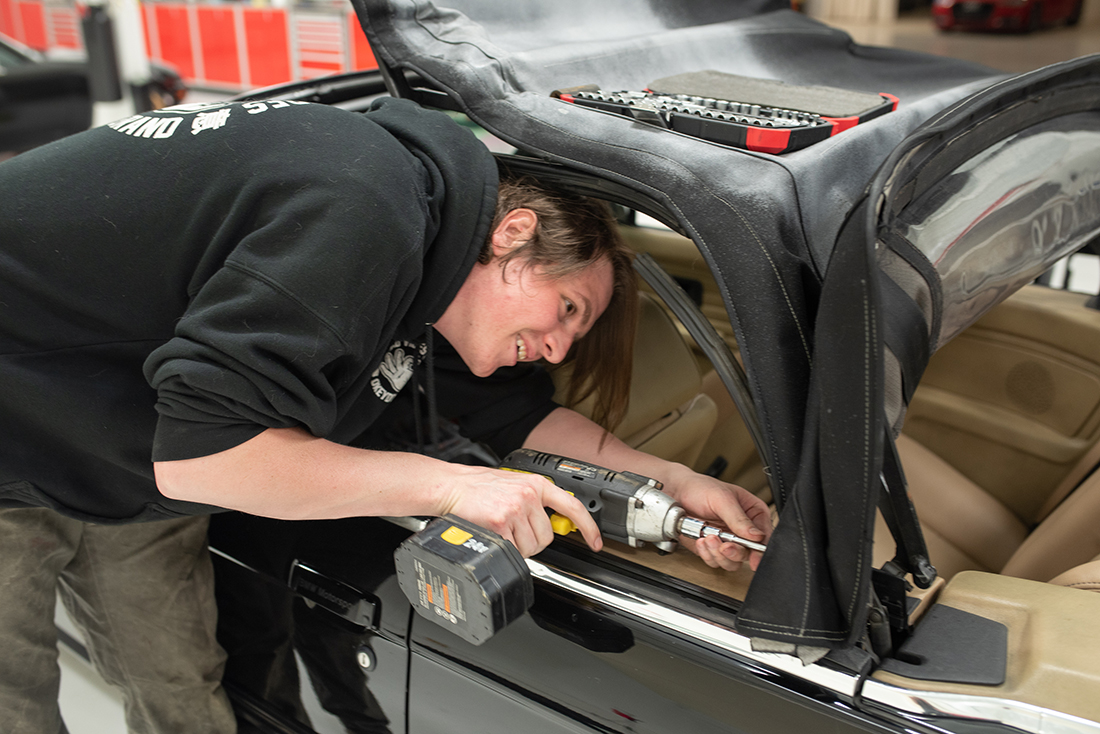
With the seals removed, you will see that the top has a rail in the front where it meets the windshield hoop/A-pillars and a u-shaped rail in the rear. Both have Phillips head screws holding them in place. With care, remove these screws. I suggest using PB here, as they may be corroded and stuck in place. You don’t want to strip these out because you will reuse them. I had to use several screwdrivers of different sizes because my top has been replaced and non-OEM screws were installed. I also used a rubber glove over the head of the driver for a semi-stripped screw that worked well. Rubber bands also work to help remove stripped Phillips heads screws by stretching the rubber band over the Phillips head driver and pressing it into the screw head.
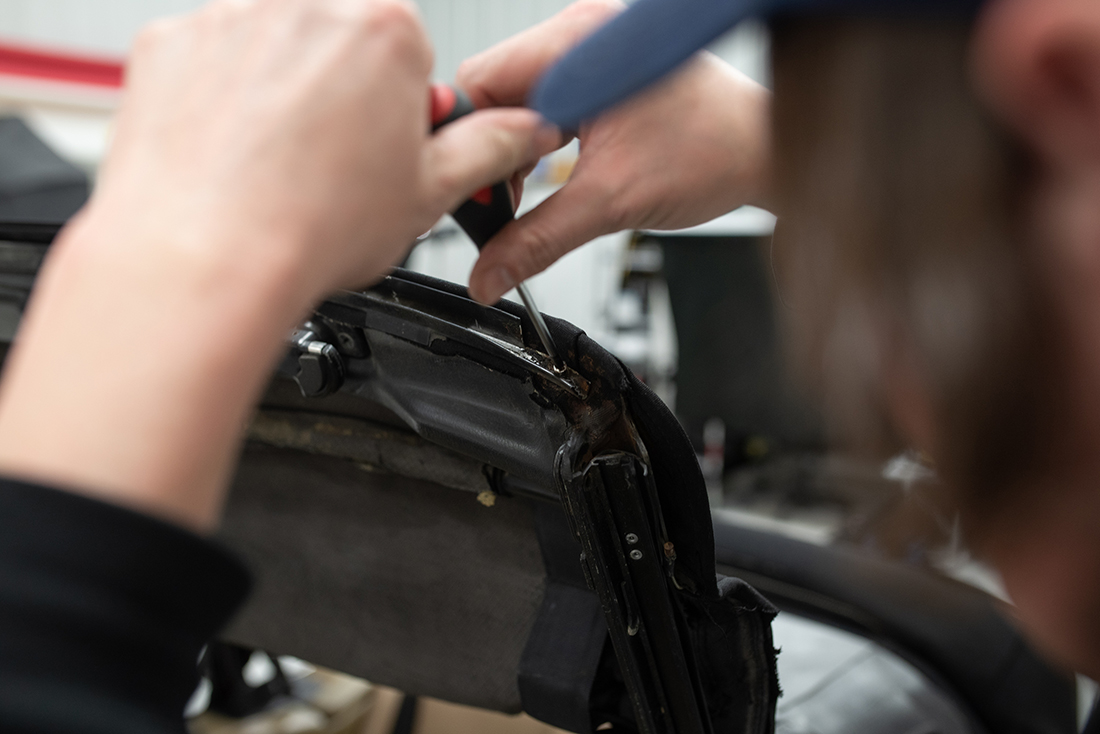
The side rails can now be removed as well. In the video, it states you need to remove all the rails along the top frame. ONLY REMOVE the front rail, the front driver/passenger window rails, and the rear driver and passenger rails. Don’t take off the middle rails, you don’t need to and those are the toughest seals to reinstall.

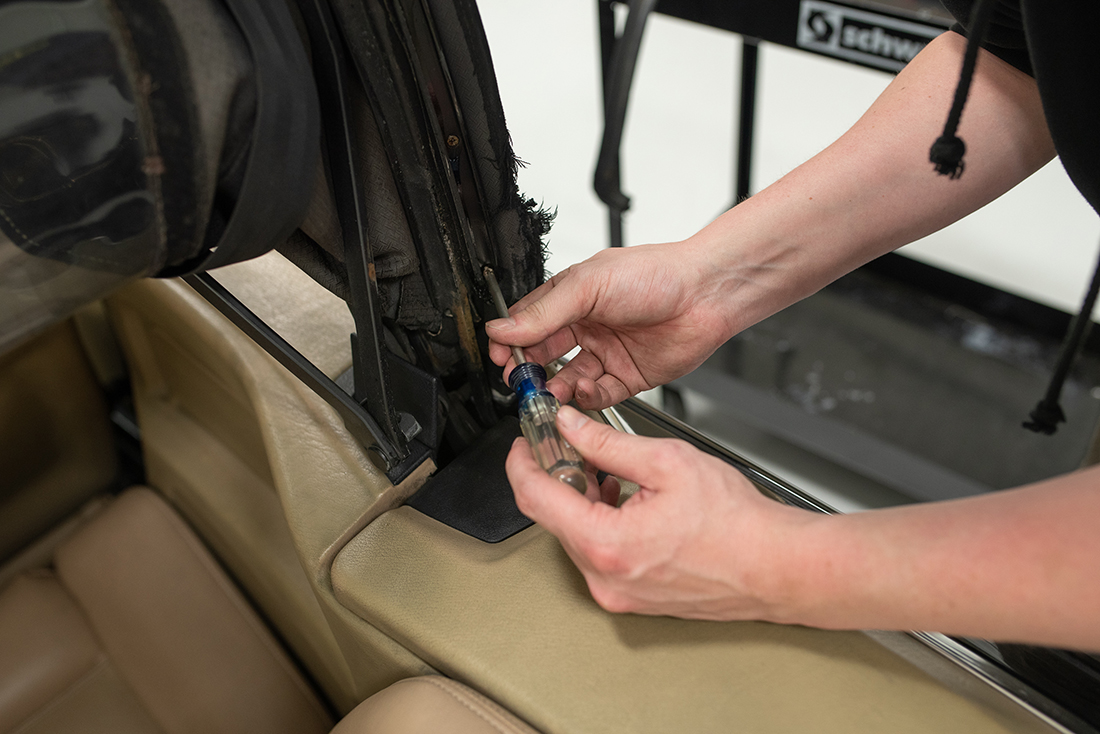


For the rear side window seals, you will need to remove the Phillips head screws as well as drill out three rivets on each side, inside the rail itself. The PO of my car used rivets that were slightly too small and mine just fell out. They should be 5/32” rivets, though.


With the rails removed, you should now see where the top is glued to the frame. If your inner bow wraps are still intact, remove them first. You may want to use some heat to loosen up the adhesive. Mine were all but falling out.


Next, remove the springs from the two cable tensioners on each side of the top. You will want to twist them toward the interior of the car and then pull them from the T-shaped hook on the frame. With the spring removed, pull the dust cover and separate the spring from the cable. MAKE SURE you see which hole on the cable the spring seats inside, as it is important to put it back correctly. Slide the cable out from the front of the frame with the rail attached and remove it from the car. Both sides should be exactly the same process.


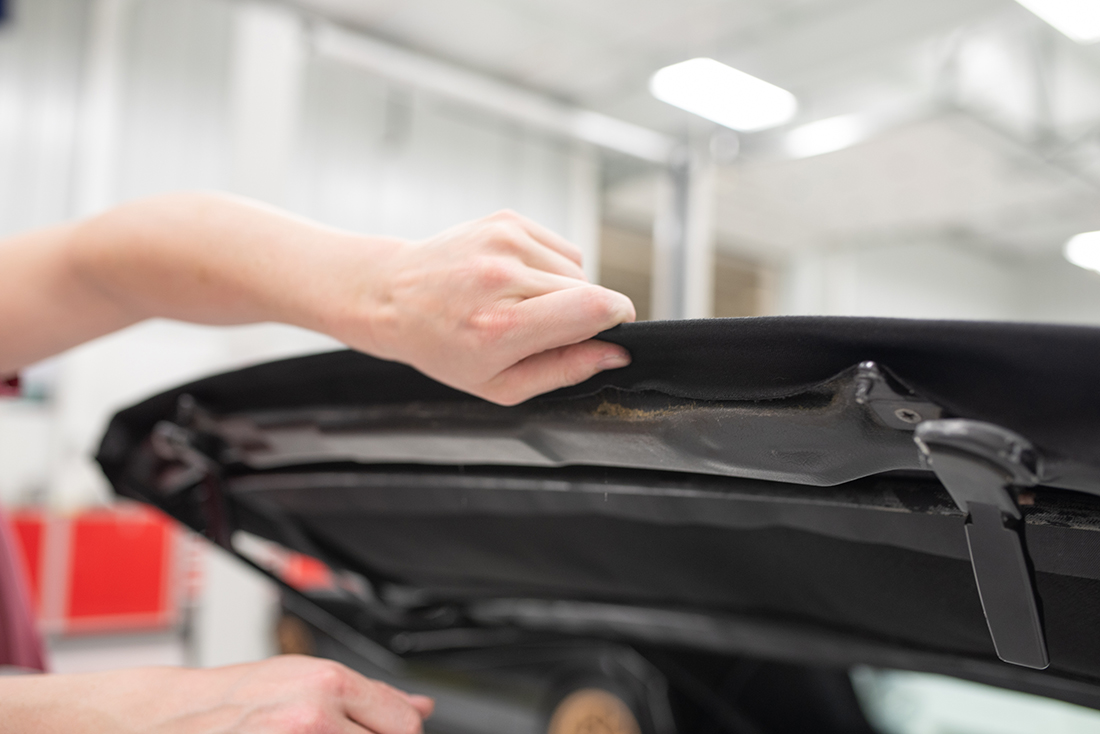
With the bows free, begin at a front corner of the canvas top and start to peel it away from the frame. BE CAREFUL. The frame is not as rigid as you think and will only become less rigid as you remove the canvas. You will slightly bend it, maybe not noticeably so, regardless of what you do, but don’t be aggressive in removing the canvas. Just work slowly and use heat as needed.
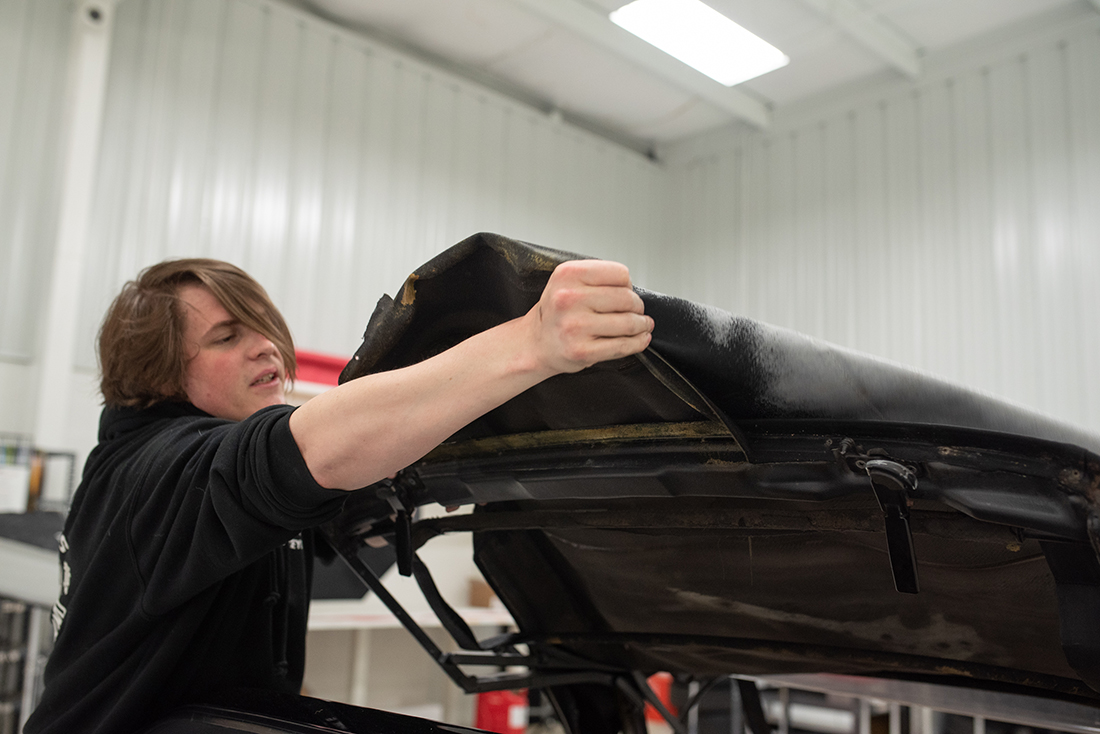
You should now have successfully removed the canvas top!
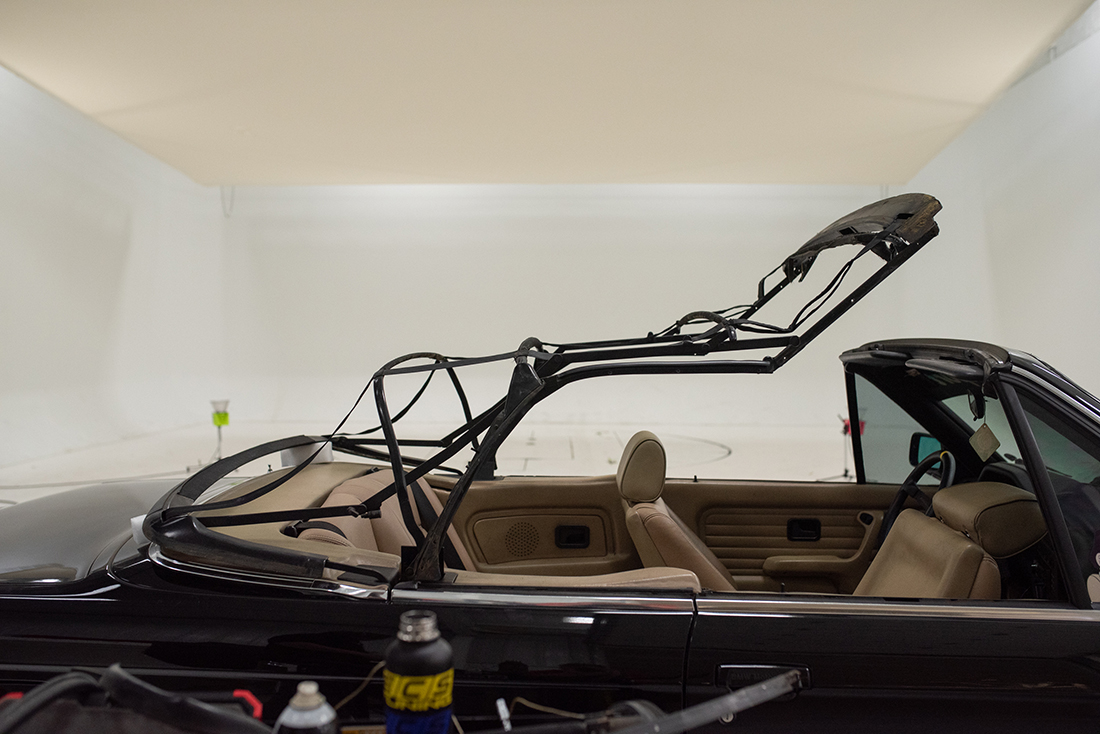
Staring at the bare frame can be daunting. This is a good time to break, as you should have roughly two or three hours invested at this point. Go ahead and walk away from this. Seriously. The next part will take tremendous patience and you will want to be fresh mentally. Go get a beverage. That’s an order.
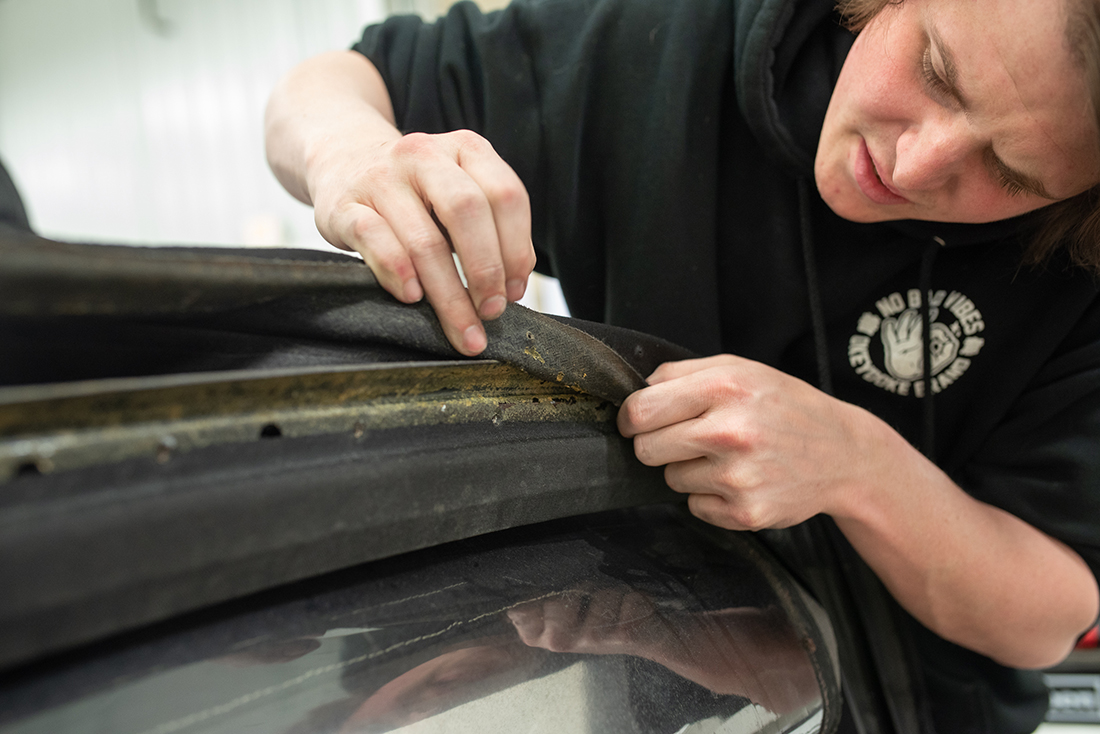
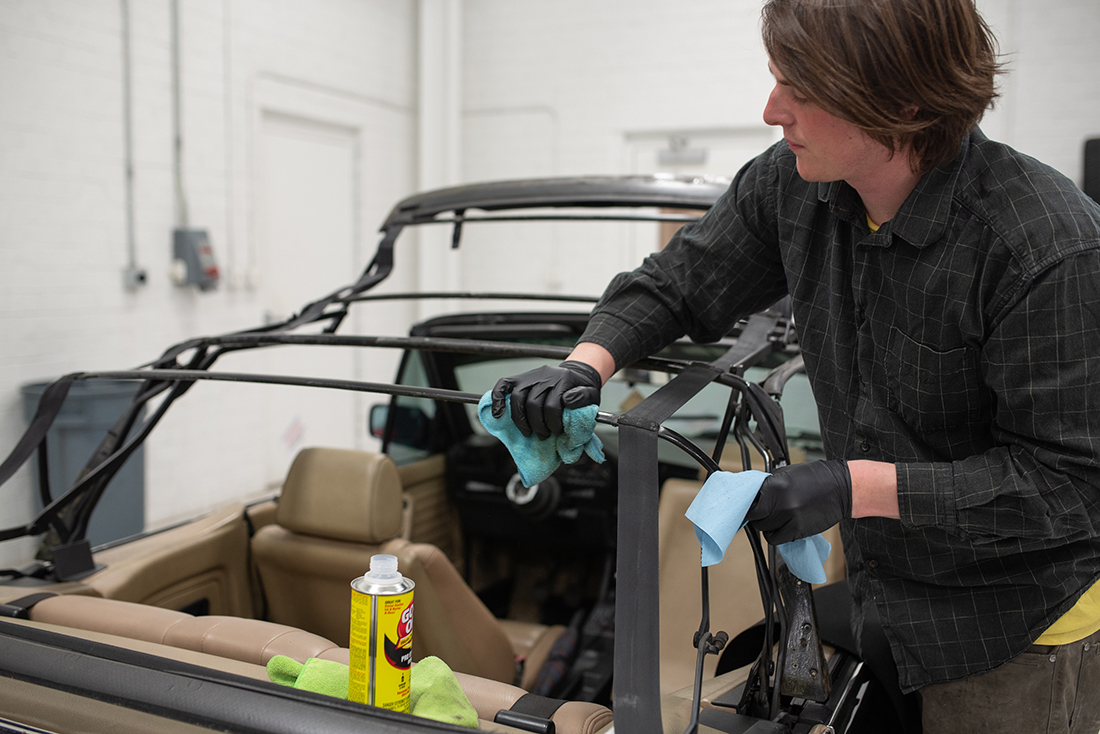
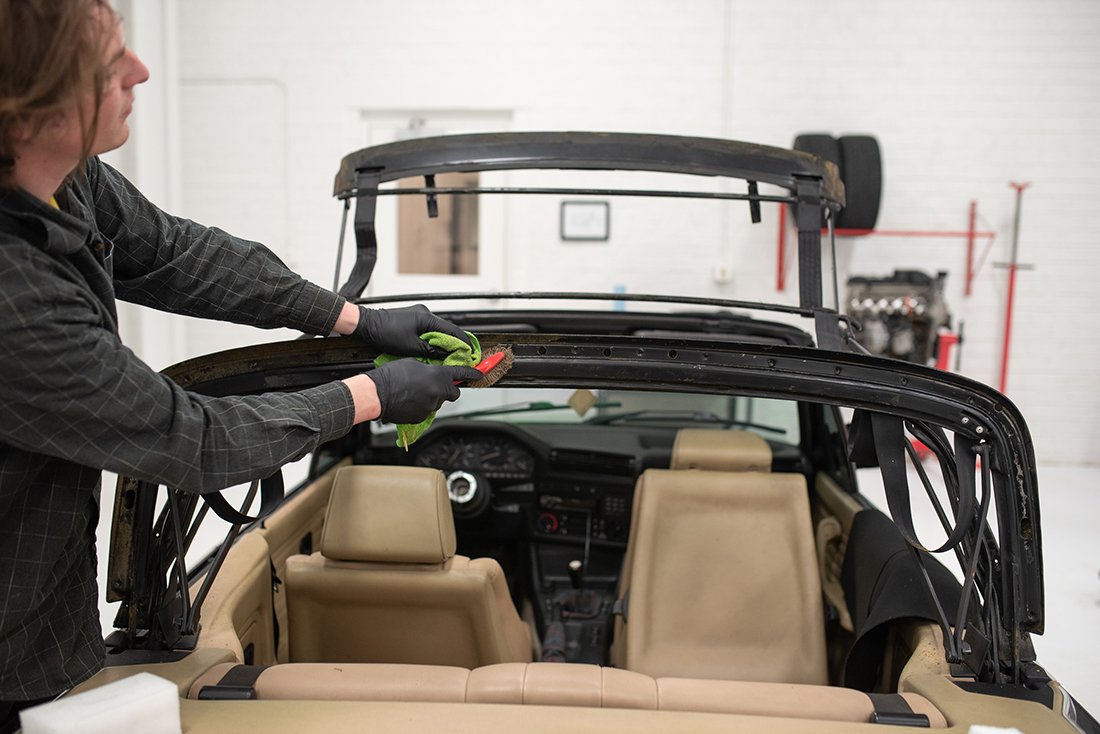
Now that your canvas is removed, you can begin stripping the old adhesive. It is VERY IMPORTANT that you remove ALL old adhesive and sealant. Failure to remove the adhesive will result in your new top not staying glued down.

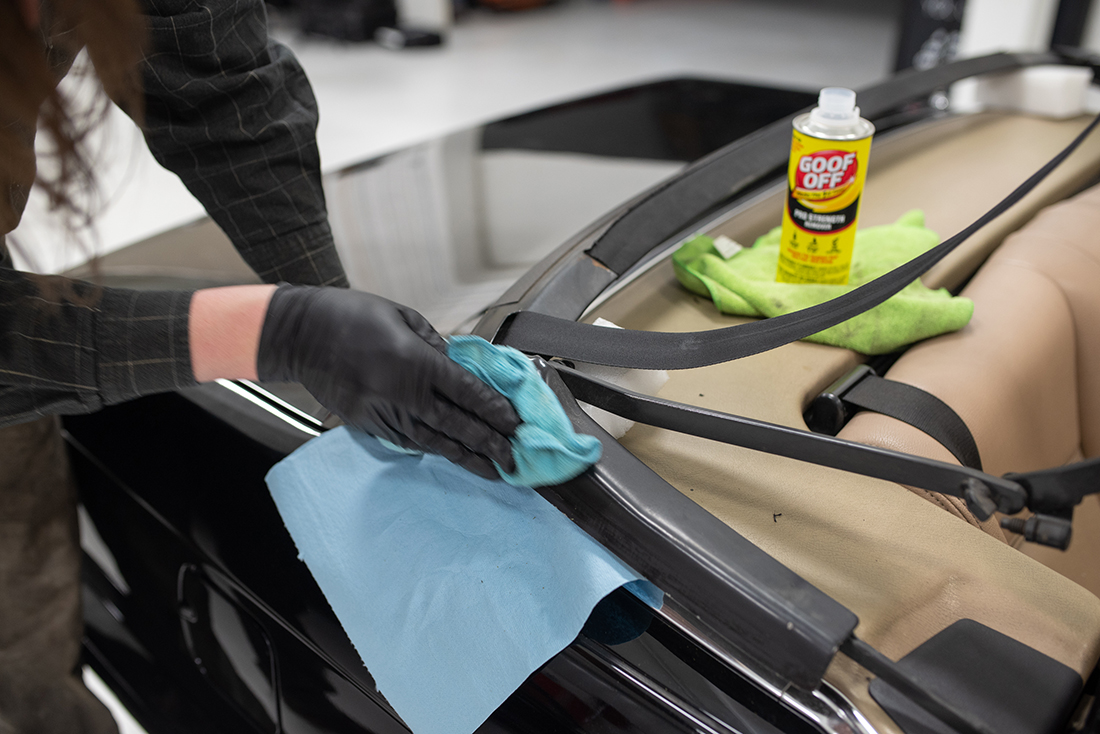
Use a coarse brush, plenty of adhesive stripper (i used goof-off,) and a towel. Soaking the towel in stripper, thoroughly coat the bows, rear hoop, and front hoop of the frame where any and all adhesive residue is. Then, soak your brush in more stripper. Use moderate force in scrubbing all adhesive from the frame. It will take a while, just be patient and work in sections. I took breaks after each bow. The whole process should take roughly an hour or two in order to remove ALL adhesive. Be careful to not get any stripper on your interior, trim, or exterior paint. This is why I suggest removing your seats and laying drop cloths over the entire car. I didn’t do this yet but learned as I went along.

After removing all the old adhesive, you are now ready to place the top on the frame. Lay it across the frame and position it so the two main seams are exactly in line with the notches on the front crossbar where it meets the A-pillar and the alignment mark on the rear lines up with the center line of the frame.

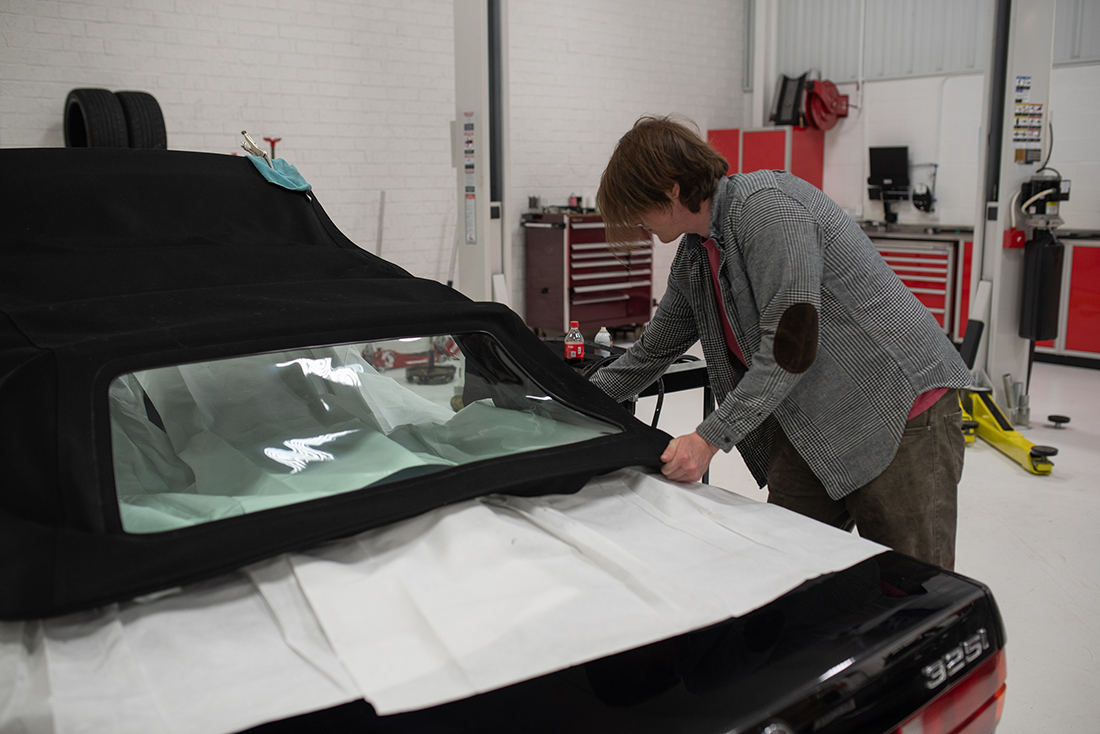
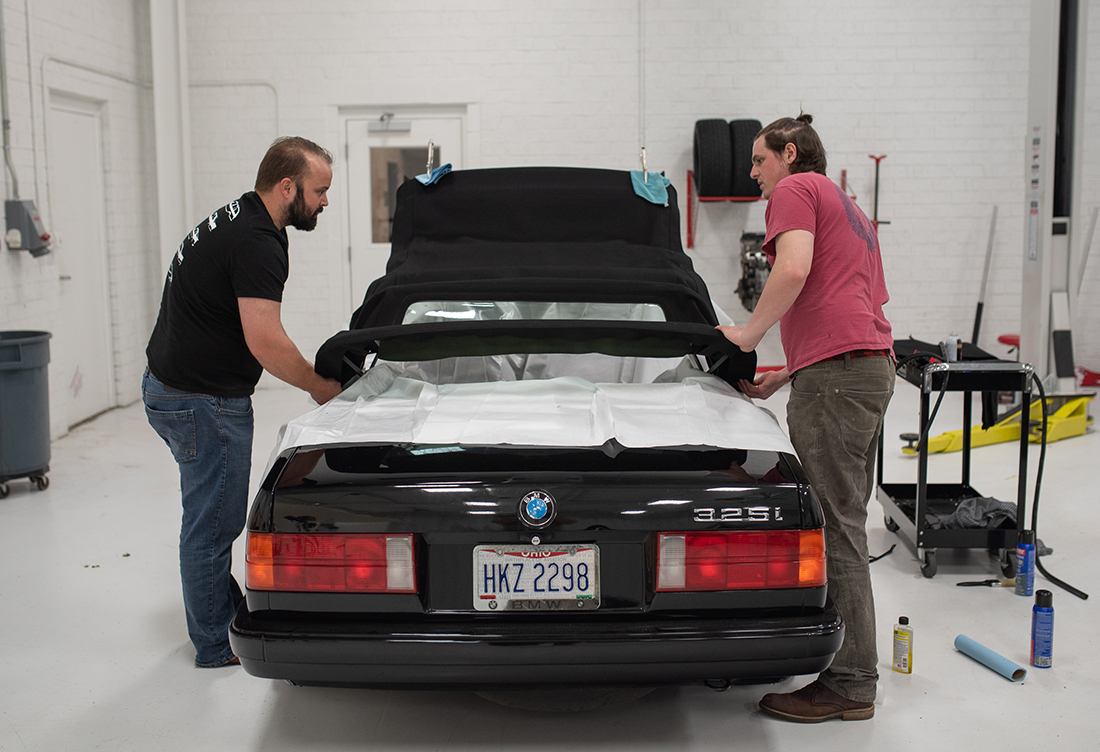
If you are doing this alone, you may have a little trouble, but it can be done. Ideally, with a friend, stretch the canvas over each side’s corner. There should be ‘pockets’ that slide over the left and right of the frame where it meets the rear passenger windows and the body. Make sure your alignment marks are still correct after doing so.
With some thick towels placed to protect the new canvas, use two locking vice grips to keep the front of the top securely in place. Be VERY careful to not over tighten the clamps, as you can damage the canvas. The towels will protect it, but only if you just use enough force to keep the top from moving around. Hulk strength is not a benefit here.
Position all the flaps you will be gluing down so they are free and not stuck behind the frame. With some newspaper or something similar, use painter’s tape to mask off the rear vinyl window. You will not want to get glue on the window as it will be a pain to remove. You can use goof-off if you are careful to remove the adhesive, but goof-off will damage the vinyl window if not wiped and cleaned immediately, so it’s better to mask it than to risk it.
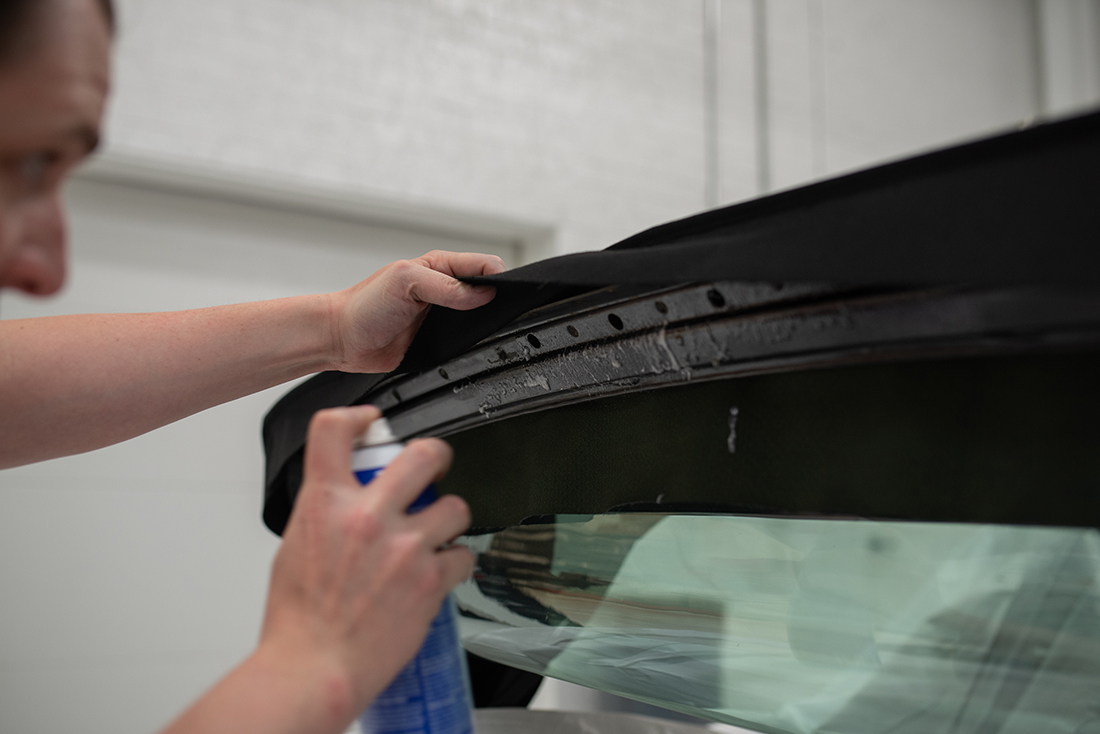
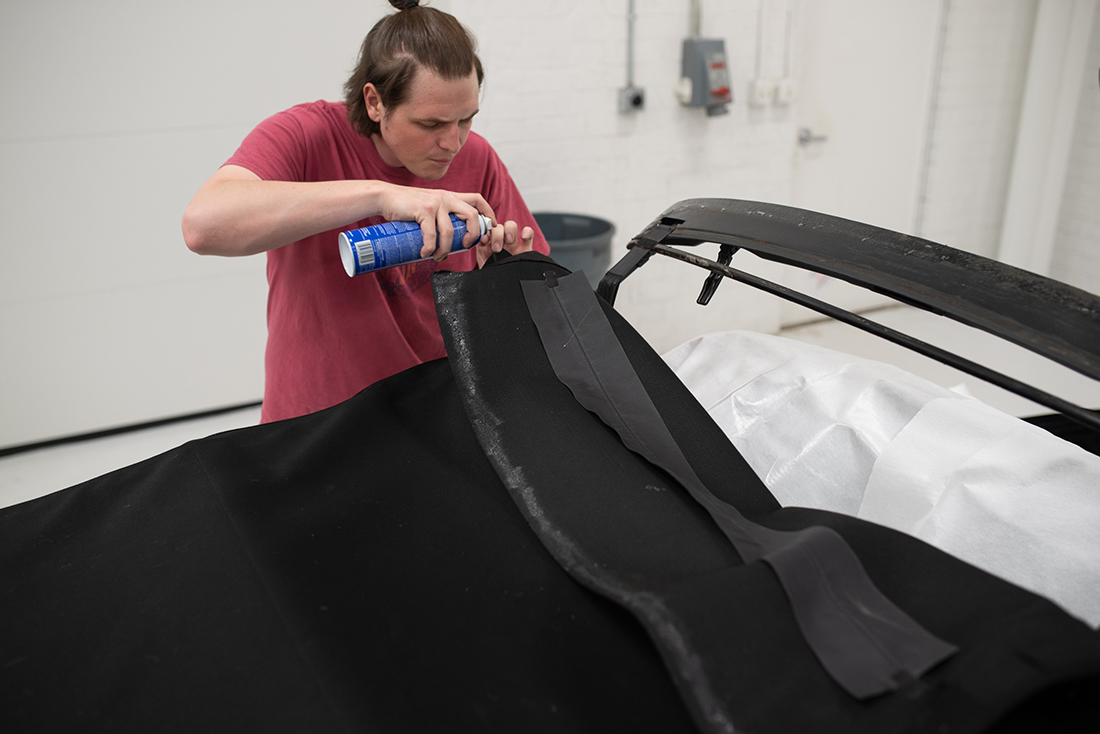
Now, with the top straight and positioned where it will live forever, you can begin gluing. I started at the rear and inched my way forward. Work slowly. Follow the instructions on your choice adhesive to the letter. The Loctite 300 requires you to spray it on heavily and then let it sit for up to 10 minutes before you press the fabric together.

Working from the middle outwards, begin pressing the vinyl flaps against the frame to glue them in place. Use a trim tool to press them together. It is difficult to describe, but as you work, you will see how the fabric wants to conform. Don’t work against it, work with it. You need to press inward toward the car, basically from the top to the edge of the flap where it ends. Don’t just press it in place, you need to work slowly, starting from the middle, and press away from the main body of the canvas toward any ridge, crevice, or another non-flat part of the frame. WORK SLOWLY. You will need to re-press, possibly use more adhesive, and maybe re-glue places as you go along. Don’t worry, it won’t be permanent until it dries entirely, which takes about 24 hours.

Next, move to the front of the top and remove the locking clamps. You should see how the top slides over each corner almost exactly like it did at the rear corners. Be generous with the adhesive on the top and frame here as there is a lot of fabric to glue down and it likes to peel away as it dries. You will need to re-press several times here and it may take you an entire evening to get it set properly. Just take your time and work from the front inwards as you press around all the nooks and crannies. It helps if you remove your top handles, but you don’t have to. Be prepared to make some notches in the fabric to dodge around the set pins.

Don’t be afraid of making mistakes, just be patient and follow the contour of the frame with your trim tool.
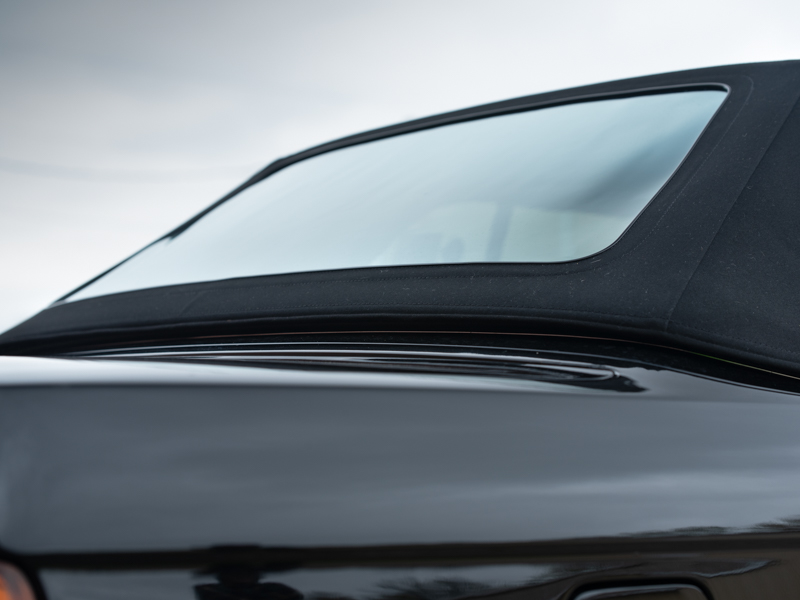
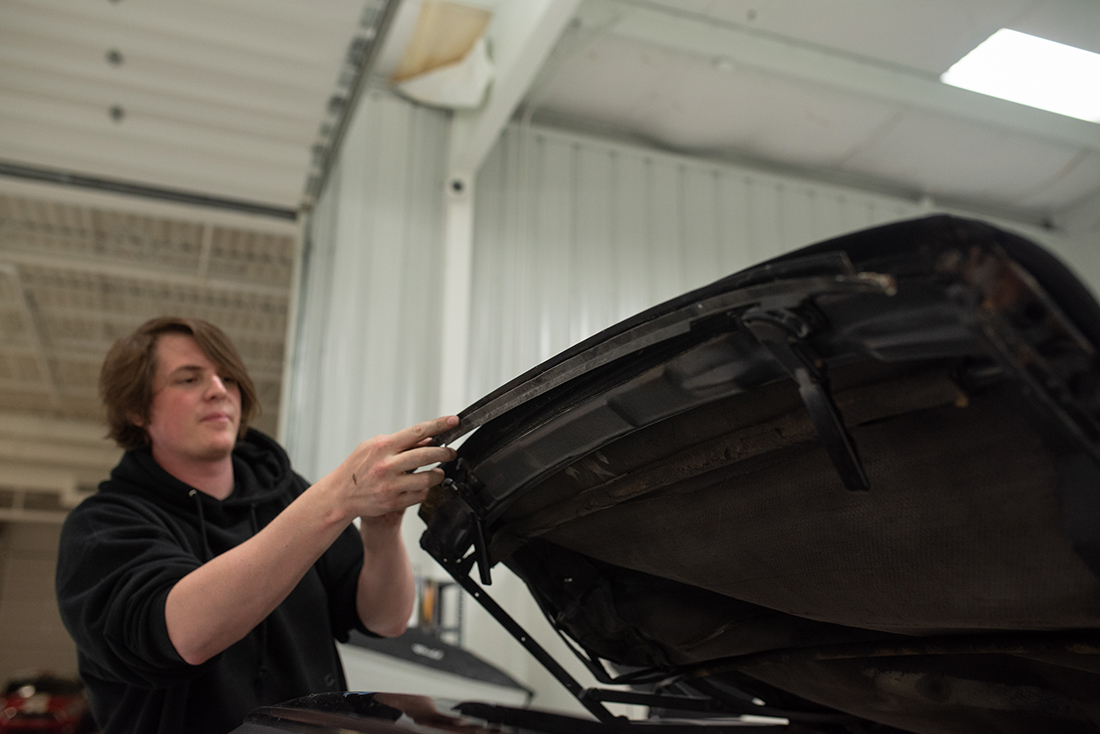
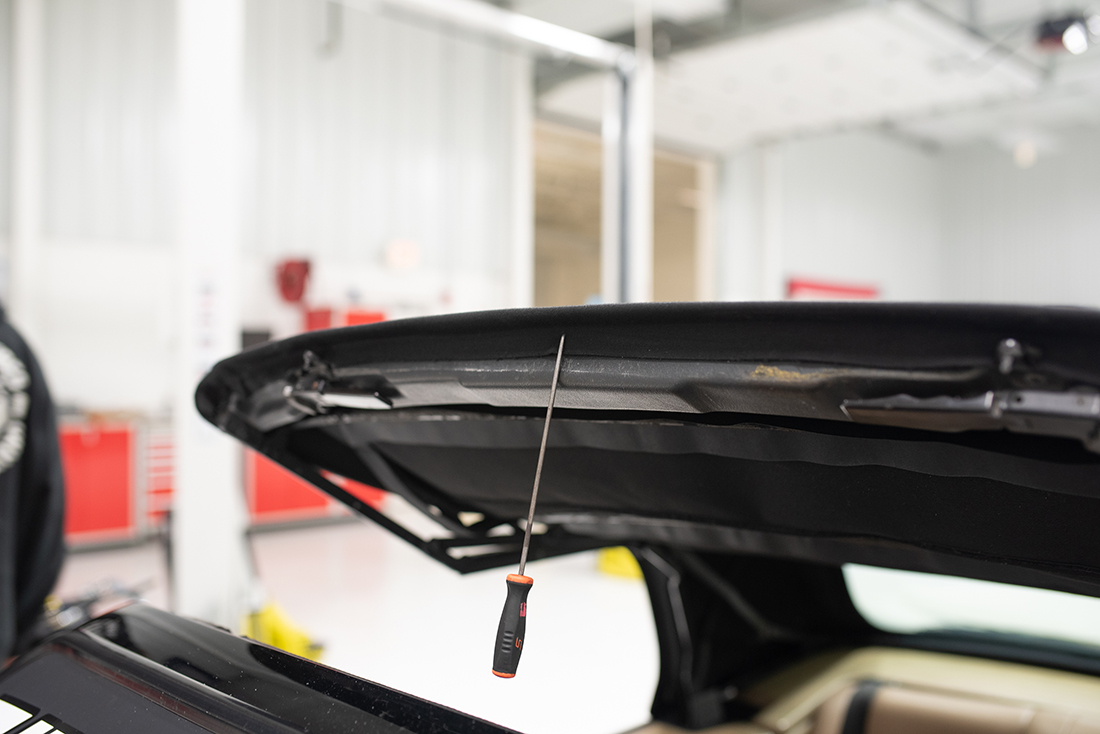
Let the frame sit half open and dry in the front and rear. This way, when you go to glue on the inside in a few steps, you don’t risk your work undoing itself.
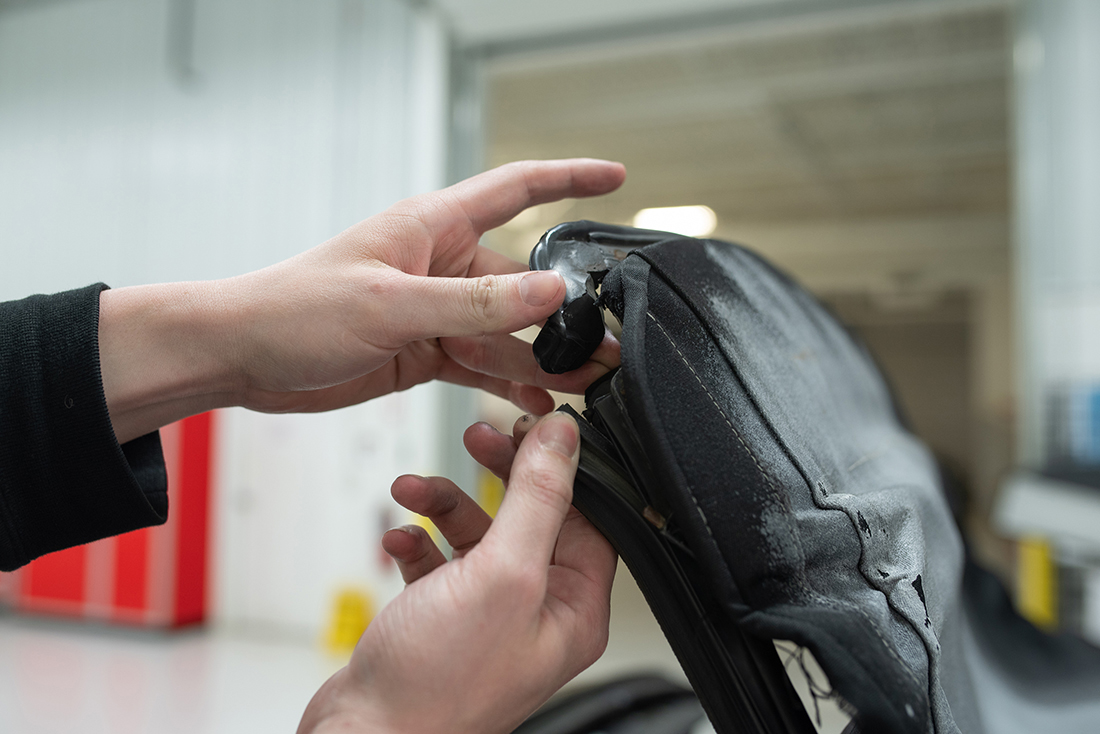
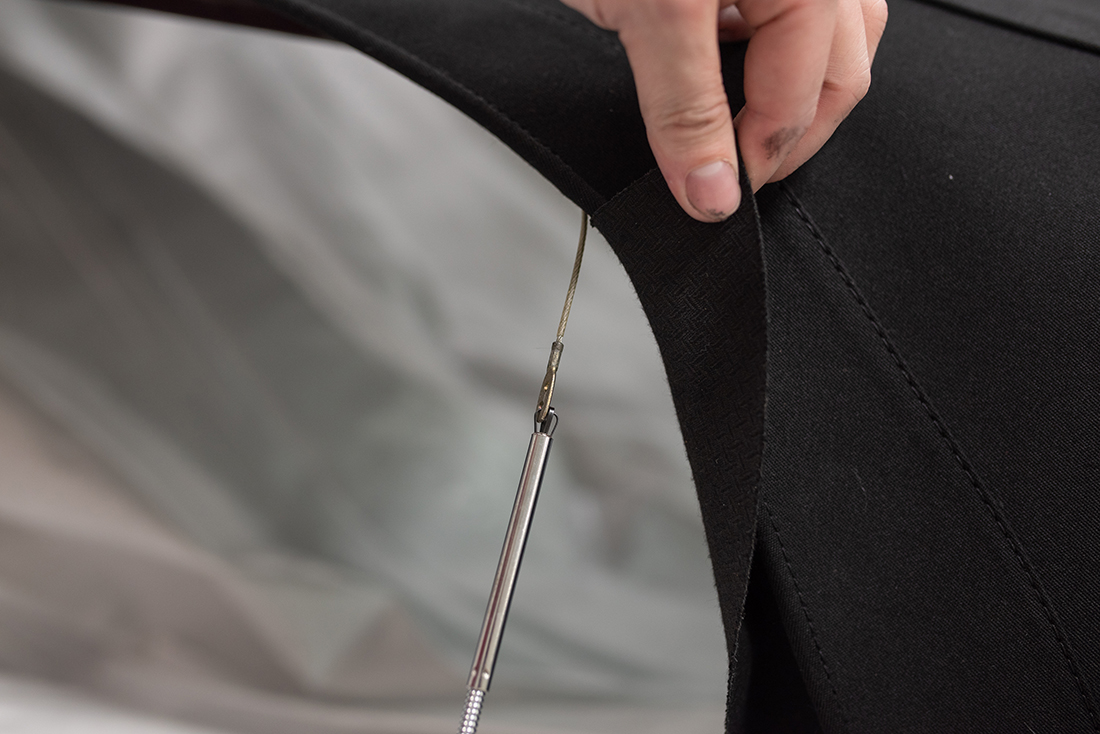
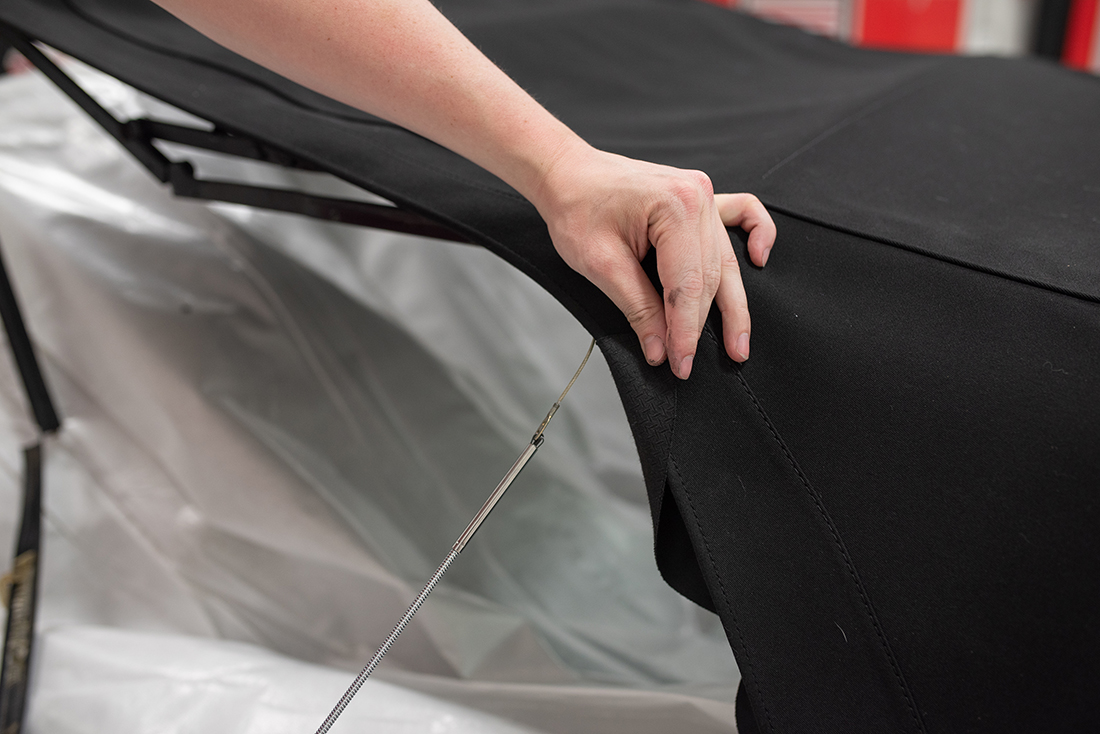
Here, you can begin reinstalling your tension cables. With a mechanic’s flexible gopher, (pictured) slide the gopher from the rear forward and the cable from the front rearward. You will be able to expand the gripper fingers, feel the cable make contact, and then let them close. It easily grabs onto that hole where the spring goes. Carefully guide it through with the gopher and pull it out the rear guide THROUGH the hinged top frame. I made the mistake of missing the hinge location and had to redo this part.
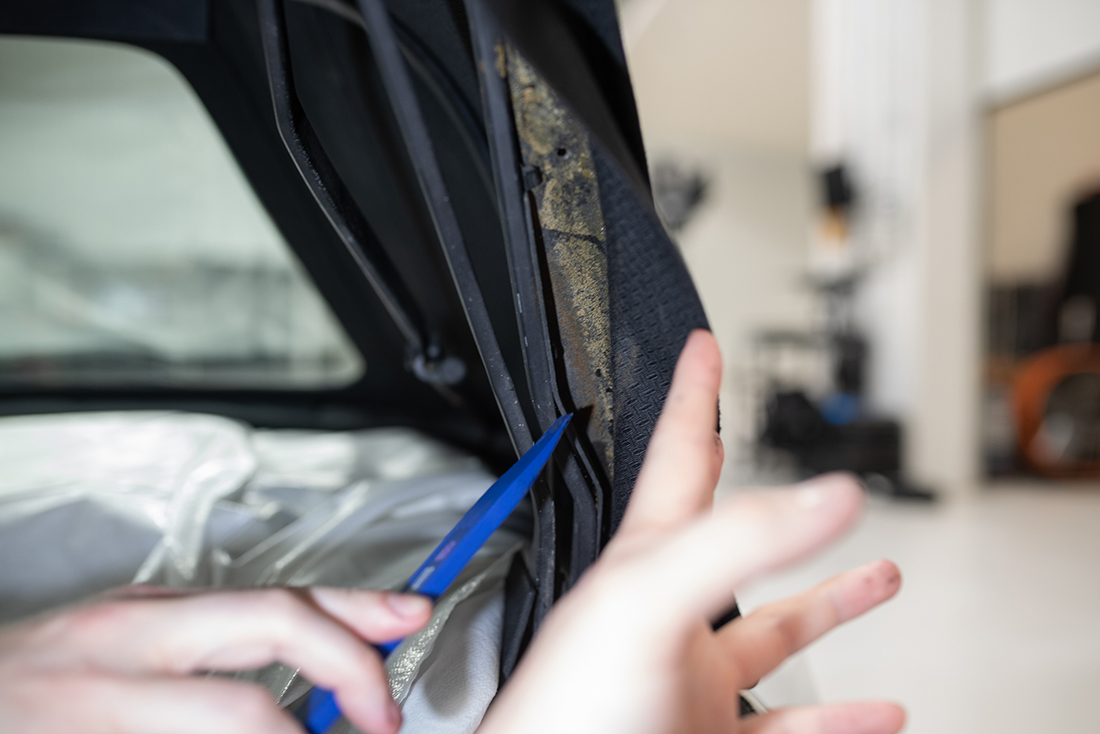
After the front and rear have been glued in place, I moved to the ‘C-pillar’ locations and glued there. These were by far the hardest to glue in place. Pull the fabric tight and work from outside-in to glue it down. It is kind of bowl-shaped on each spot (where the rivets were) so glue one flat section at a time, not at once. Where the rivets go, don’t use a lot of glue, as you will have to cut that part out later and it is a pain to pull it out if you have it expertly glued down.


With that, your top should be glued in place with the exception of the inner bows, which we will save for later.
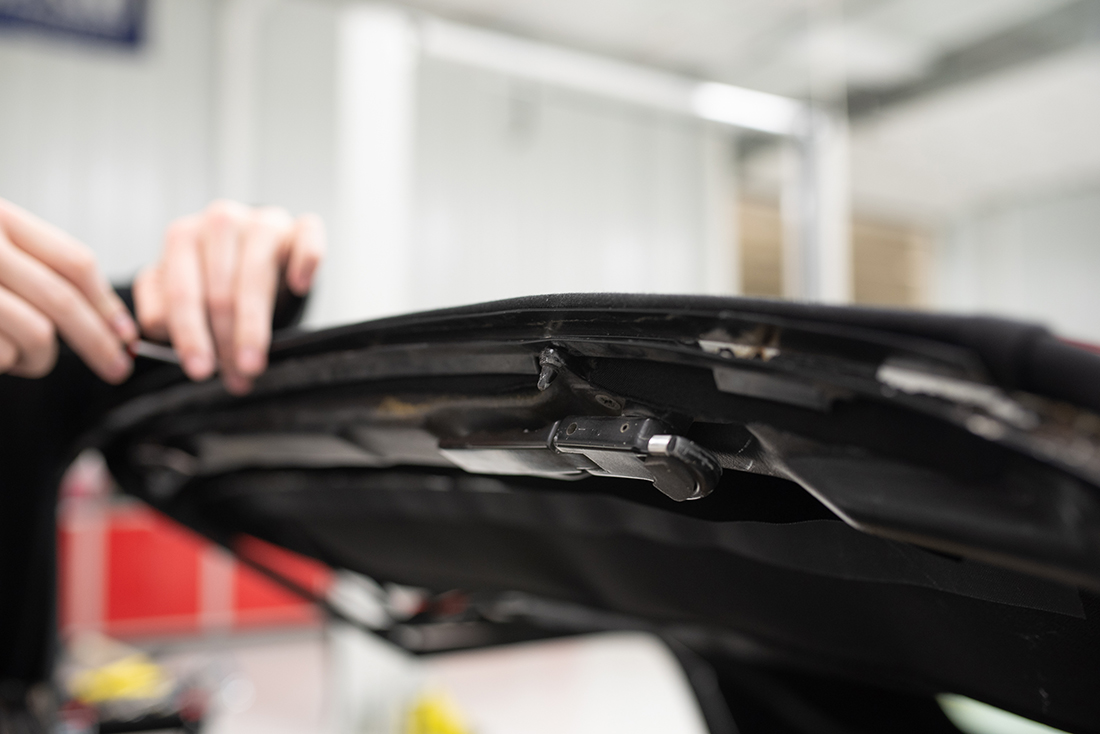
Next, install the dust cover and spring. Then, check the rivets on the top rail where the tensioner is connected up front. I went ahead and replaced these rivets as mine were no longer holding the cable mount properly.
Then, install the front rails with their Phillips screws.
Moving back to where you just installed the tensioner springs, you will see the holes on the back side of the difficult spot you glued that canvas earlier. With a pick, punch through those rivet holes and threaded holes into the canvas. You should now see exactly how much material you need to cut out in order to reinstall the rails there. It is about a 5” tall by 2” wide section of the material you need to cut out on each side.
With that material cut, you can install the acorn nuts and supports as well as rivet the rails in place. They rivet in very easily. You are now in the ‘smooth sailing’ part of your DIY.
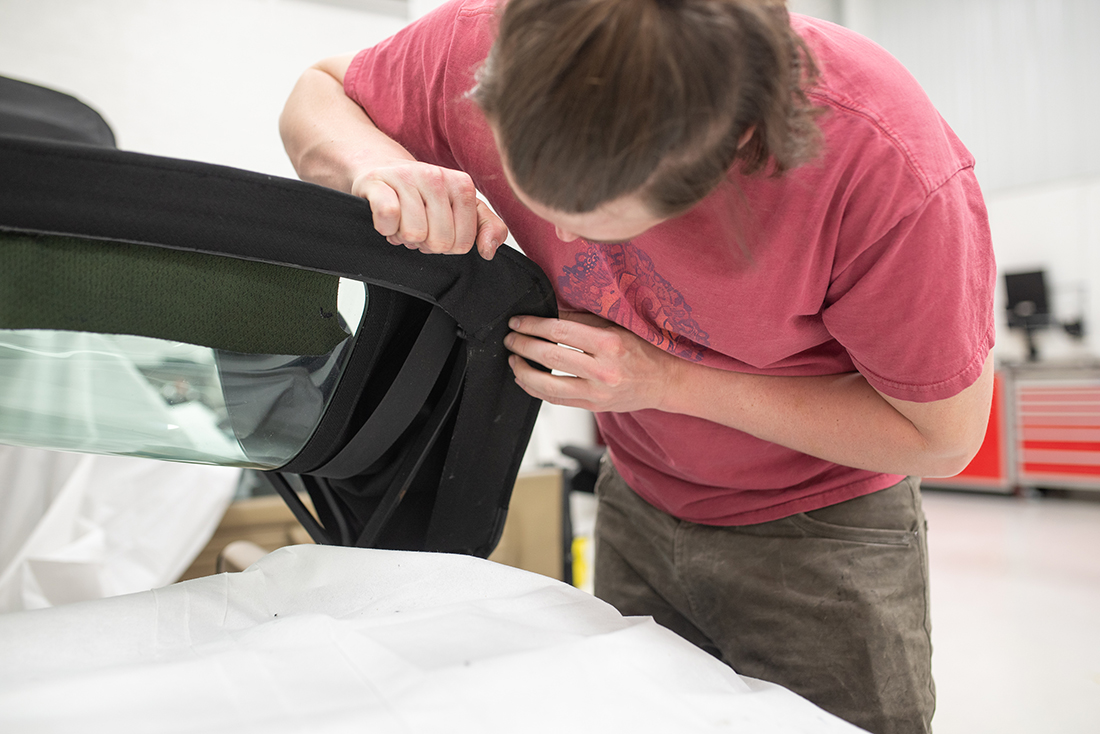
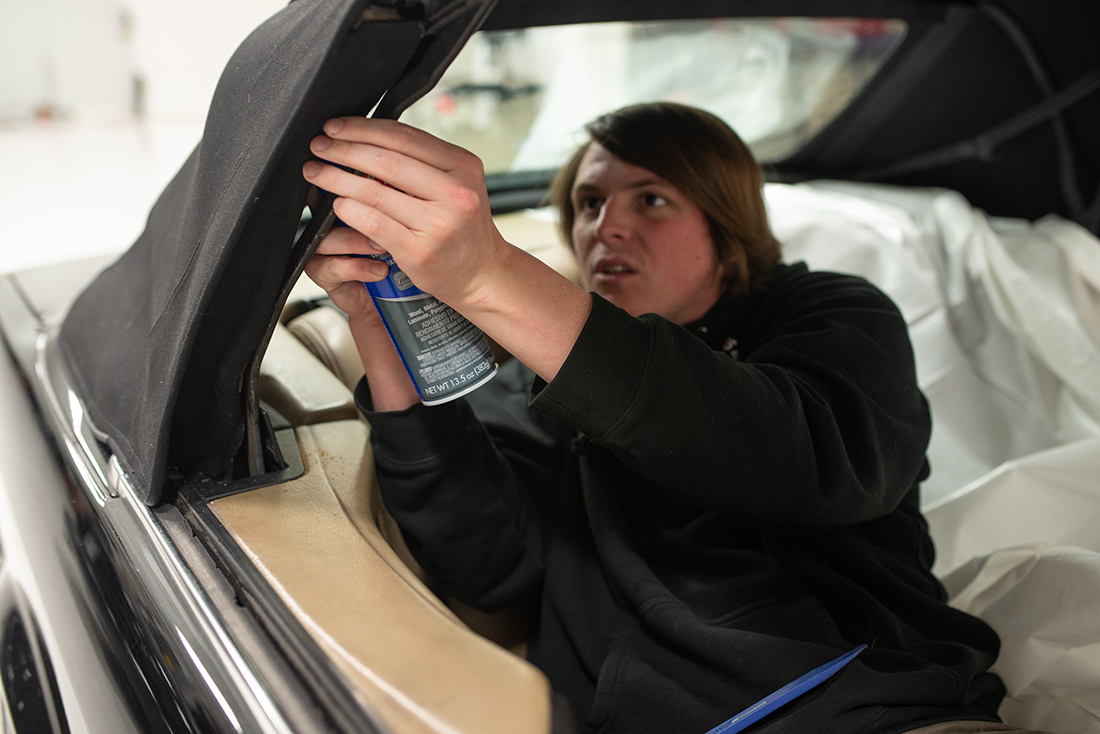
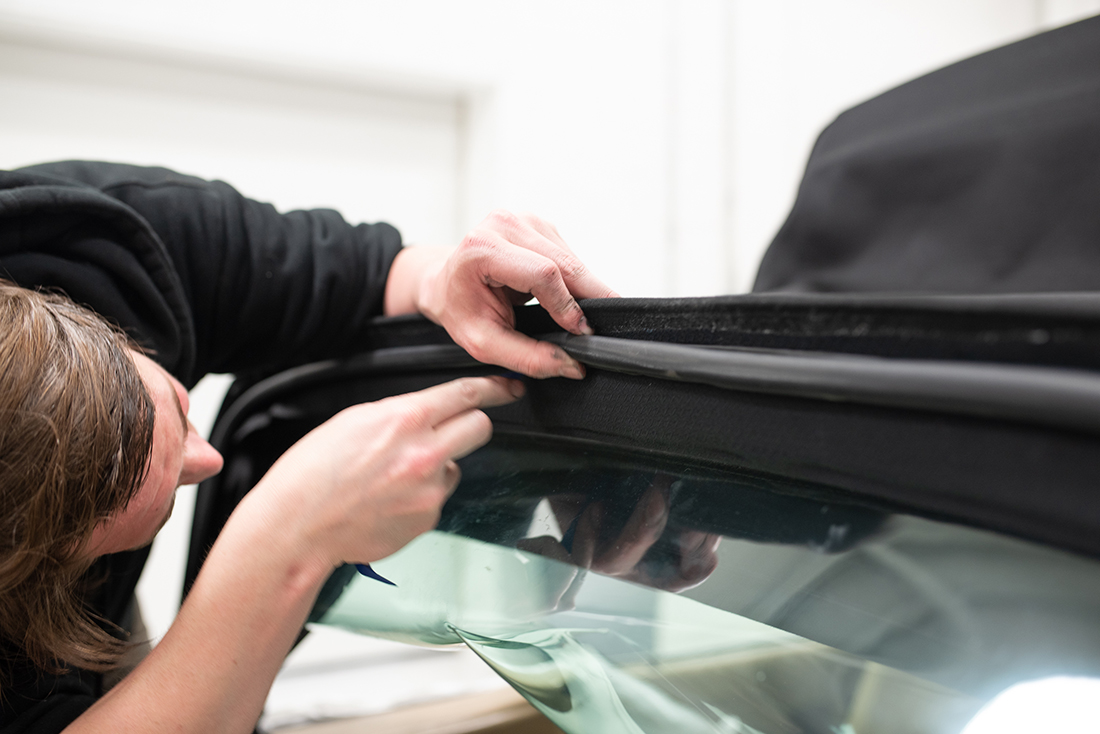
Slide the rear window seals in, starting from the bottom and pushing upwards. I used silicone lubricant on the rails and seals to make them slide in easily. You will want to both push and pull up at the same time, but they will slide in cleanly if the rails are clean. Then, there should be two screws, one per side, to secure the bottom plastic part of the seal under the rail against the top frame.

Repeat the process with the front driver and passenger window seals, starting from the middle of the car and working forward.
Now, return to the rear and install your rear seal seat. I used a pick to create guide holes for the screws since there is fabric over the top of where the holes are. You should find the center hole first, screw the rail in place, and then find the two farthest corner holes. With those three secured, you should just be able to punch through each of the remaining holes without any blind searching. I even went straight through most of them with just the screws since it all lined up.

Repeat this exact process with the front rail. I left the handles in place since they had marks on them where the rail sat before, which allowed me to very easily find the screw holes and line it up. The handles also held that rail in place so I could use both hands to press in the screws through the fabric. This is NOT how BMW says to do it, so be careful you don’t bend that rail so much that it doesn’t accept your seal.

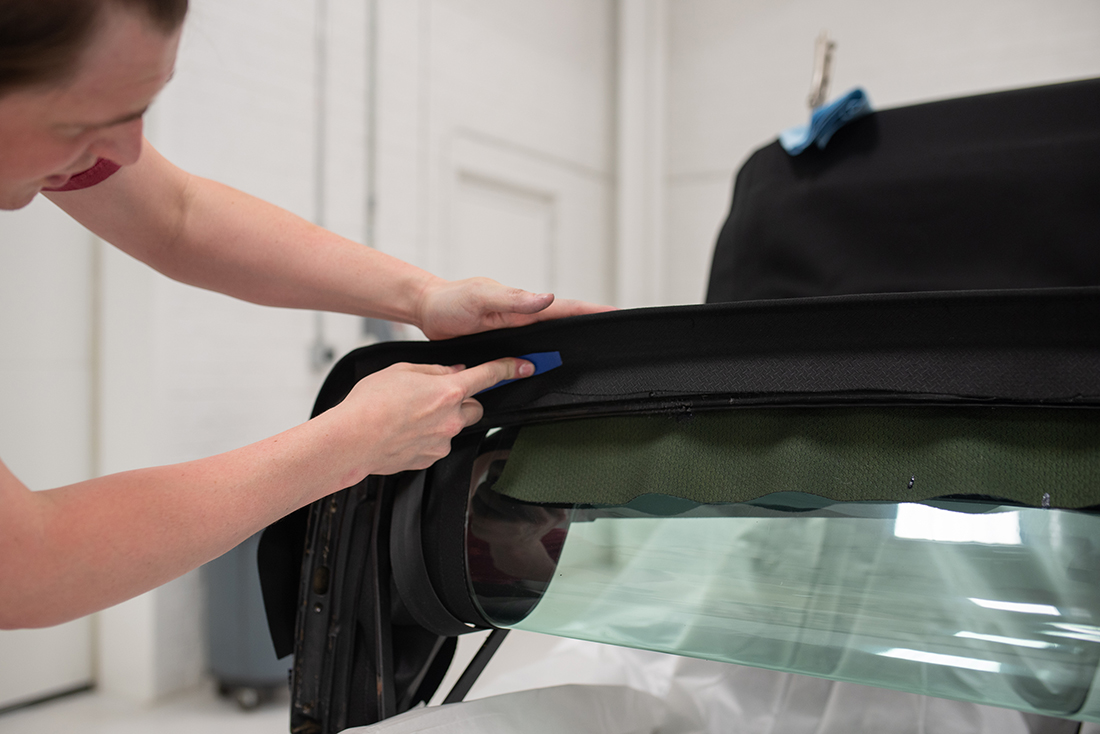
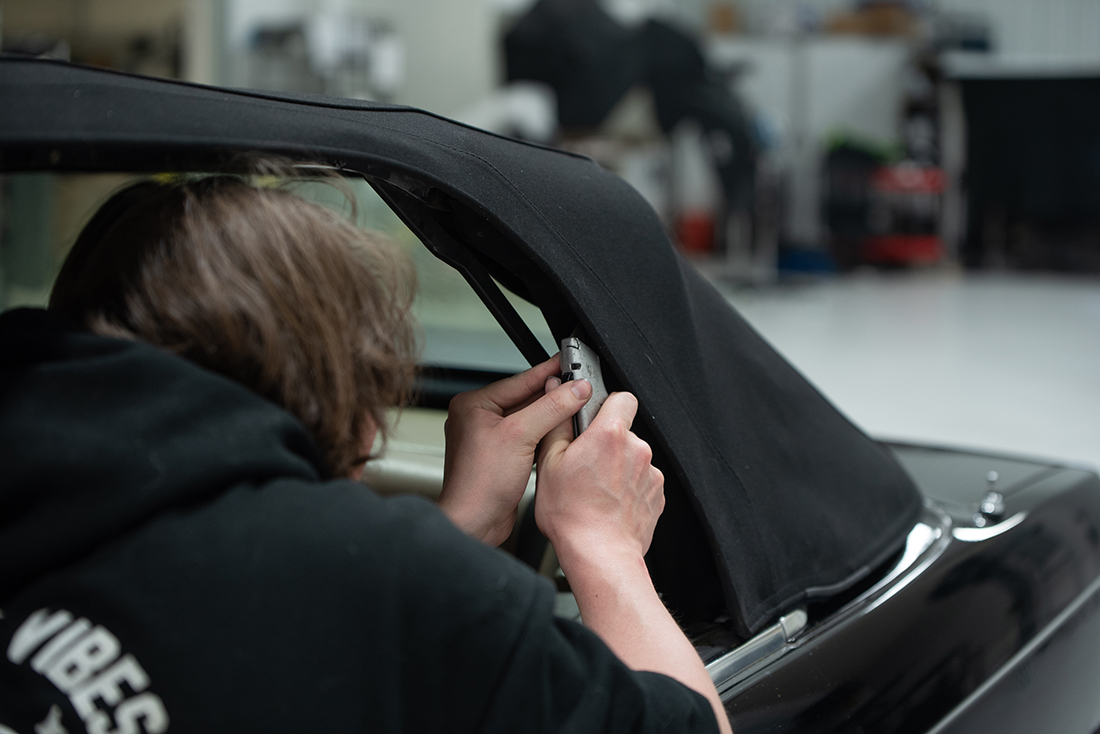
Reinstall both the front and rear seals with a trim tool. You should be able to press in one side of the seal by hand, then use the thin, flat, plastic trim tool to poke the rest of the seal into its seat.
Now, fasten the top completely closed and get inside your vert. You can begin gluing the wraps around the bows in place. I started in the rear location and worked forward, doing one flap at a time. I wrapped one side around each bow, let them dry, and then did the second flap. I used almost a full can of adhesive on just this part since it is fabric on fabric, not the fabric to frame, for some of this.
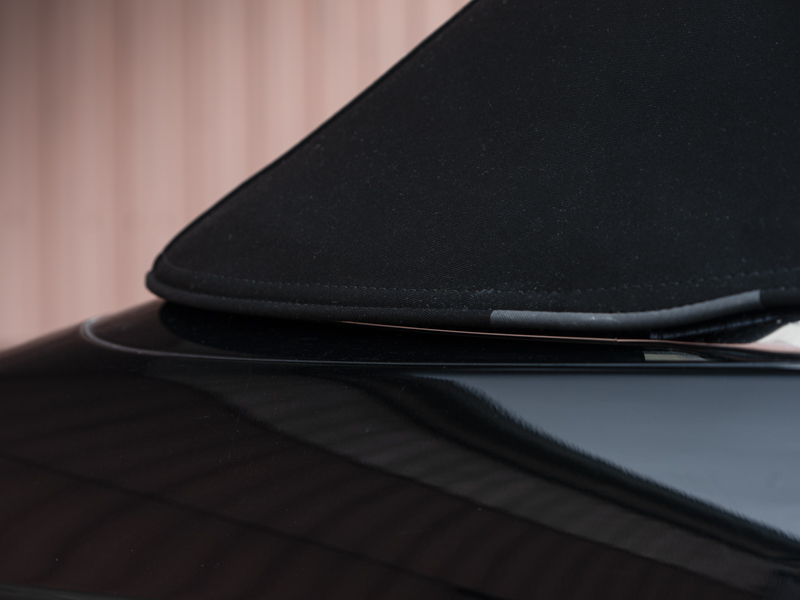
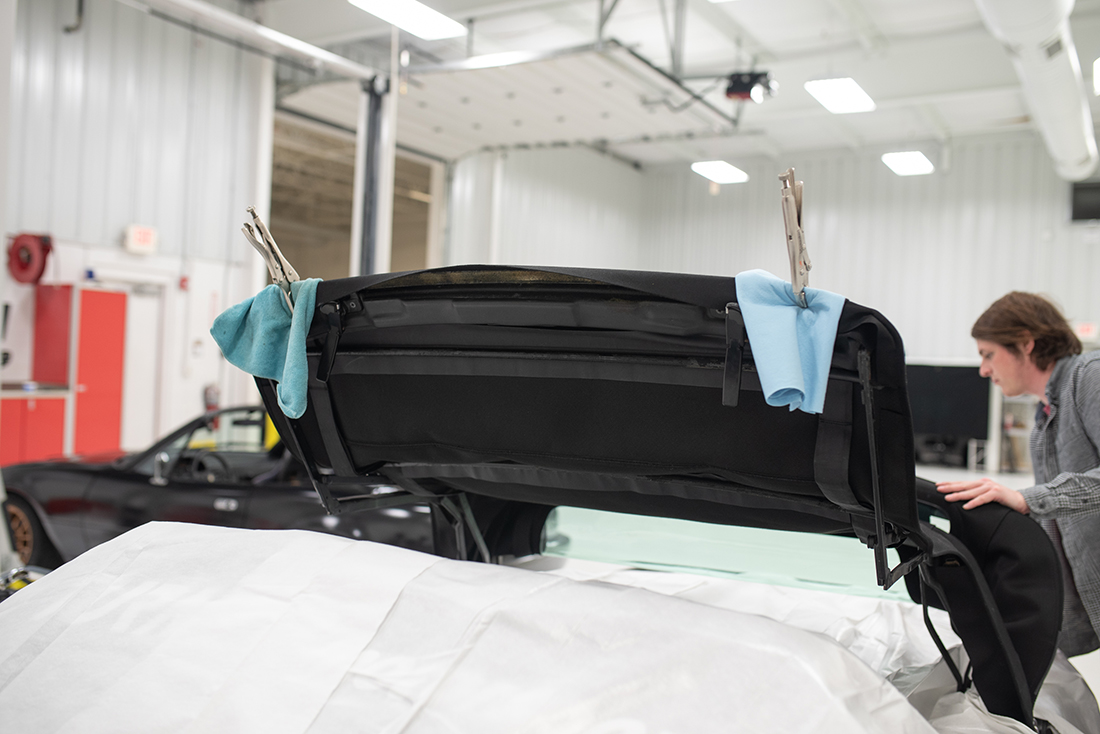
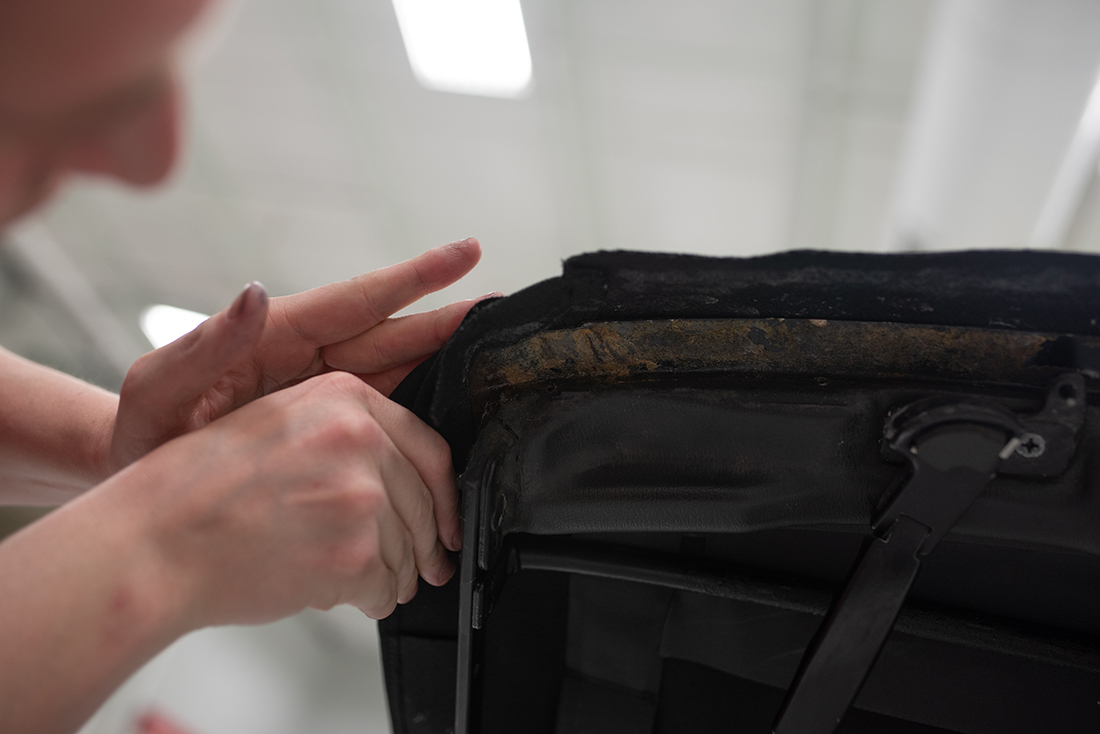
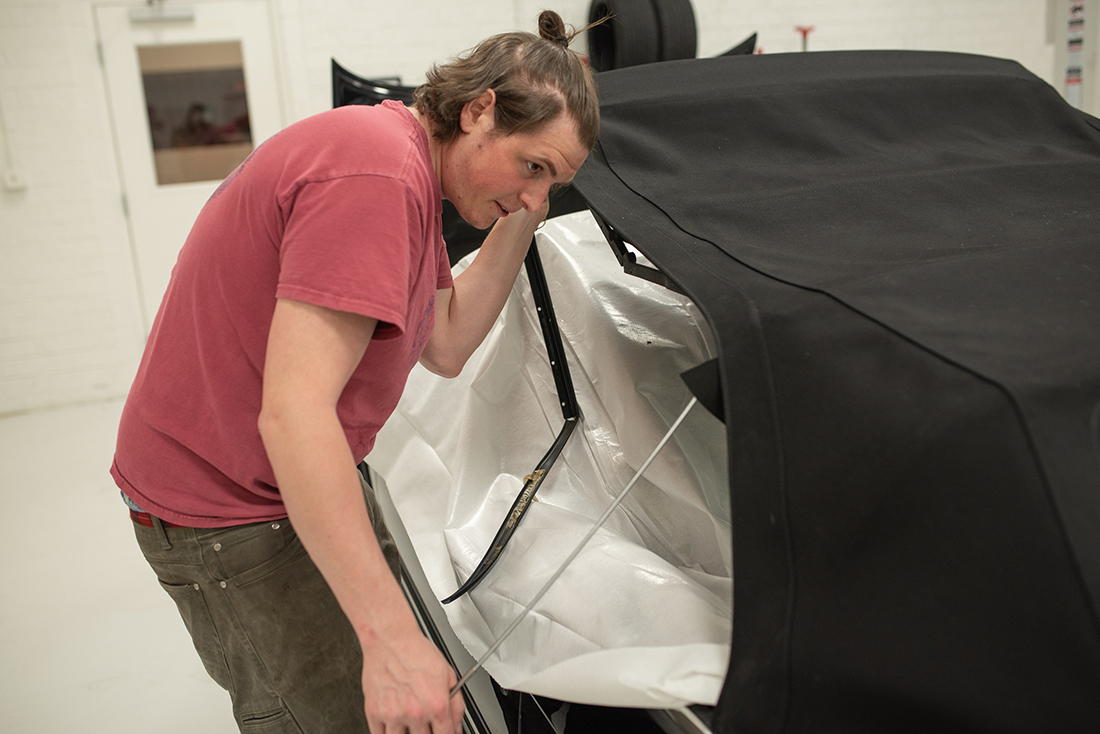
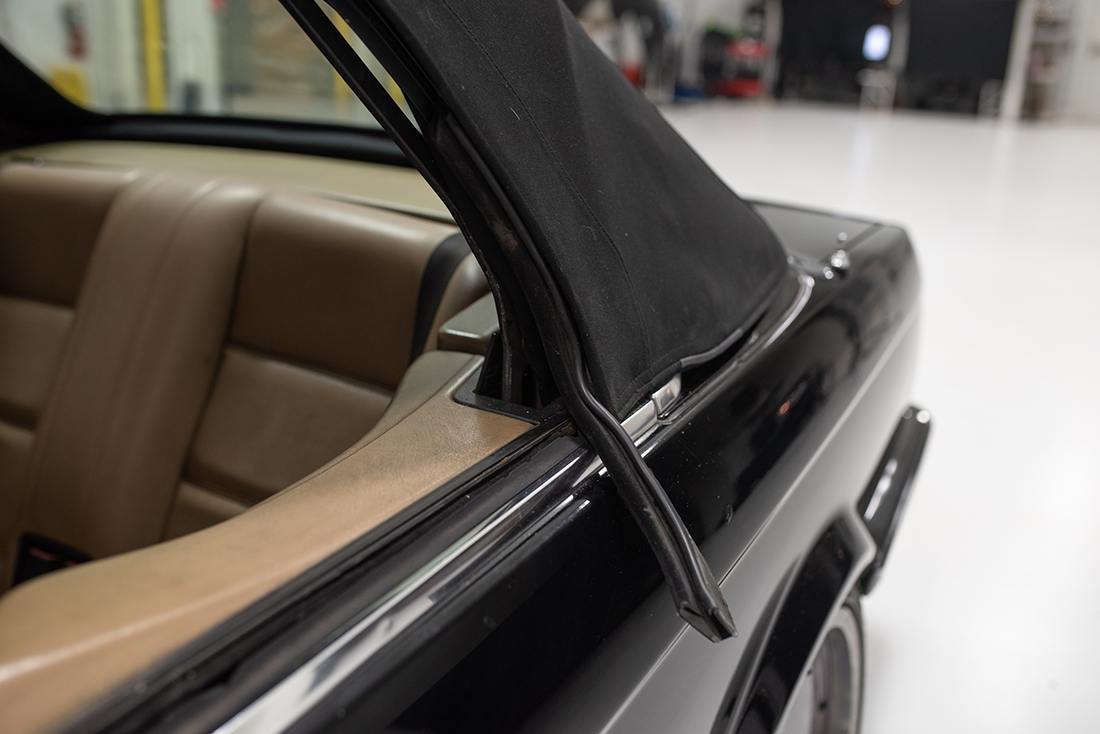
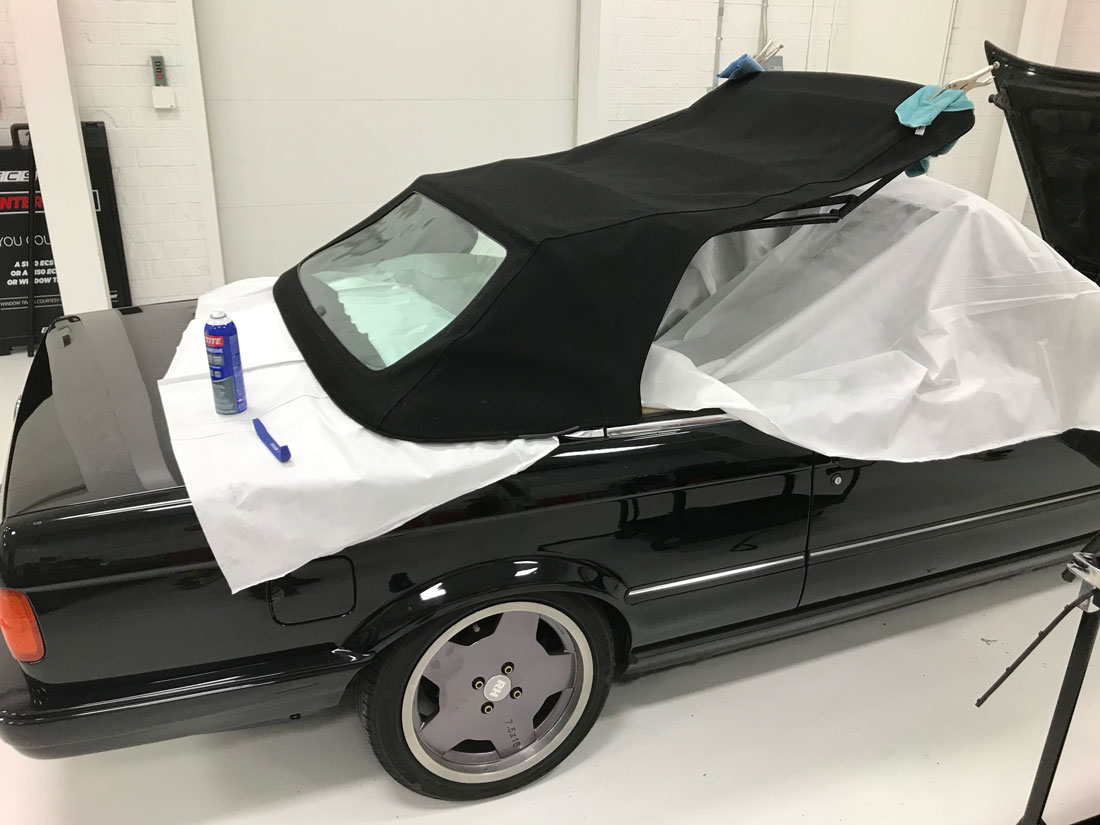
Lastly, using your seam sealer (Sikaflex 221 is the ONLY option I found that is both an adhesive and a sealer) fill in any gaps in your front and side seals, but not where there needs to be any articulation or movement. Let dry for 24 hours in the half-closed position (pictured).
Congratulations, you now have a completely replaced convertible top! Enjoy your drive, rain or shine, in your refreshed E30.