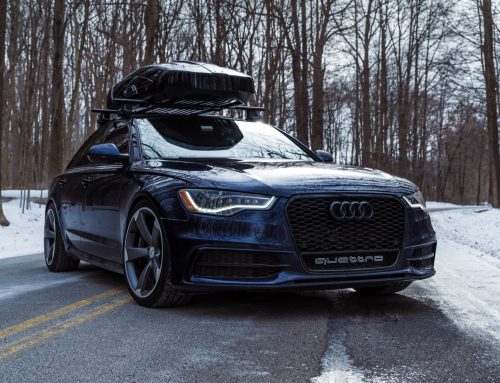
You may remember a few months back when I wrote about a Volvo 240dl 5spd wagon I picked up for a friend of mine who asked me to find one, fix it up, and bring it to her down in Nashville. After waiting on all the parts to come in from their various suppliers, I finally had everything staged in my garage and ready install on the car, only a few weeks behind schedule. With the holidays over and some freakishly warm weather this past weekend, I was able to spend a ton of time in the shop and take the little wagon from rough and tumble to plush and minty, but not without some strife. That’s where my favorite, and often most important, piece of equipment came in handy.

Working on this old Volvo has been both exciting and incredibly frustrating. I love having a project to keep me busy and motivated, and this wagon certainly does both of those things well. From replacing the minor stuff like the tail light housing and hatch struts to the more aggravating jobs like repairing the old gauge cluster and replacing the rear bench latch mechanism, making this thing great again has had its ups and downs, but it is motivating and gratifying as I cross repairs off the list. Even though I have many, many, many hours wrenching on old BMWs, I have more often than not been slightly frustrated with this wagon, though. The Volvo is so incredibly similar mechanically to my E30s that it seemed easy at first glance, but once under the skin, everything is just different enough that it makes me scratch my head. It’s like every part is just one notch to the left when compared to my BMW, which makes everything just a little more difficult.
The most headache-inducing things I have found so far have been in the suspension department. Where the E30 uses a wishbone-style front control arm and a-shaped rear trailing arms, the Volvo uses straight bars in both locations. The E30 has a fully independent rear end, the Volvo has a solid beam axle setup, similar to most mini trucks. This didn’t prove all that difficult, but some of the ways everything bolts together did.

I understood my order of operations when it came to replace all the steering and suspension components, and I knew how everything fit together, but I didn’t expect it to be such a massive pain in the ass. Since Volvo uses a hard line from the brake caliper to a soft line on the strut, the brake lines have to come off to remove the front strut assemblies. This is monumentally stupid, in my mind. It’s just one more step that doesn’t need to be there. The brake lines could easily be flex lines from the caliper to a clip on the strut and then a hard line on the body, like most other vehicles, but nOOOOoo. It’s a Volvo, so it has to have the extra measure of difficulty because fuck me, right? Naturally, that meant all the brake lines in the front had to be removed and would ensure that I had to flush and bleed the brakes. No biggie, I had already picked up a full bottle of brake fluid with this in mind. More on that later.


Along the same lines of added difficulty, the control arm ball joints were yet another area of weirdness. Where BMW uses pressed ball joints inside the wishbone control arms, Volvo has bolt-in ball joints. Yes. Bolted to the control arm and then bolted to the bottom of the strut. While this makes replacing the ball joint itself easier, it makes for additional steps that don’t need to be there. To remove the strut assembly from the car, which is required for this Volvo to replace the struts and top hats, you have to unbolt the lower ball joints. Which, of course, have two nuts that are bolted to a plate with studs that hold it to the control arm, rather than two individual bolts. Why? Because fuck me again. If you remove them first, it means you have to use your knees and a floor jack to lower the whole strut assembly down when you remove the strut mount nuts. If you remove it after undoing the strut mount nuts, you have to sit there and shoulder the whole assembly, keeping it from contacting the fender arch, while you undo the ball joint nuts under the control arm and then sort of sit back on your butt, hoping the strut assembly doesn’t bonk your noggin as you pull it down and towards you out of the car.

Now, Volvo says you should do the control arm bolts first, and then lower the strut assembly down after undoing the strut mount nuts. That’s the way I did it for both the passenger and driver’s side this time, and it worked fine. However, when I originally pulled all the suspension apart after Bilstein sent me the front struts they say work for this car (they don’t,) I did the ball joint second. I liked that method better since I felt like I had more control over how the strut dropped out. That said, I did it the Volvo way this time, and everything came apart fine. It was just so aggravating.

Now, you may be wondering where my favorite tool in my shop comes into play. That’s with the reinstallation of the front suspension and the rear suspension, which I am getting to. After I had replaced both the struts with new KYBs, installed new strut mounts, replaced the destroyed lower ball joints and shredded stabilizer links, I ran into some issues. I had to pop the tie rod ends with my pickle fork to pull the front suspension assemblies out, which is normal, but had to do some mental gymnastics to get those outer tie rods replaced and install the refreshed strut assemblies. My favorite tool, you ask? It’s my brain. Yes, using a bit of the ol’ gray matter is what made the difference, and usually does, when it came to getting everything back in the car.

Because this is a 30-year-old Volvo wagon, almost everything I could find to repair it was aftermarket. When I went to install the newly refurbished strut assemblies, I found that the replacement strut mounts were ever so slightly angled, just enough to make them unable to bolt into the existing bolt holes in the strut tower. After over an hour of heaving, lifting, twisting, and sweating, I finally decided to take the old mount and compare the studs to the new strut mount studs. Sure enough, both the new mounts’ studs were just barely angled out farther than the OEM studs. With my channel locks, I massaged the circular plate from where they protruded and was able to force them into their homes. I happily installed the nuts and little spacer thingy on each side and rammed them home with my impact, happy to never touch them again.

With just a little bit of ingenuity, I was able to make something work. The deadline when I am to deliver the car is this Friday, so waiting for replacement parts that may or may not have the same issue is out of the question. However, I was able to successfully install those front struts and move on to the tie rods, yet again another opportunity to pull my favorite tool out, dust it off, and put it to work.

Usually, with original tie rods, you can expect them to be pretty stuck. These were no exception, as they were supremely stuck to the inner tie rods. I like to use locking vice grips on the inner tie rods where there is often a spot for a wrench. With the vice grips in place and another set of grips on the outer, I went to put all of my burly man-strength behind twisting those little johnnies off the inners. No dice. Even after a long and soothing soak in PB blaster, the tie rod ends were quite married to the inner tie rods. Naturally, I went for my second favorite tool: the torch. I was would either twist these stupid things off or melt them off, but they were coming off one way or another.
After what felt like half a can of gas, I had the passenger side tie rod glowing red. It was hot enough that when I clamped the vice grips back on, they dug into the now softened metal. All I could hear in my head was Emperor Palpatine chuckling ‘good, use your hate’ as I lodged the vice grips on the inner against the control arm and smacked the vice grips on the outer tie rod with my 10-pound sledge. With a satisfying *pop*, the 30-year-old outer tie rod loosened itself and I carefully unthreaded it before letting it, and my vice grips, clatter to the ground where it hissed and spat, instantly vaporizing the water that had dripped onto the floor of my garage from a spilled drink cup that was in the path of destruction while I wrenched on the wagon.

Fortunately, the driver’s side was a different experience. I went and set up the same system I had used to free the other side, but decided to twist it by hand after the PB blaster soak, just to see. Happily, and to my surprise, I felt it turn easily. I simply twisted it off by hand after the initial crack with the vice grips. With that, the whole front end was refreshed and back together. Onward to the rear!
Here is where I noticed the biggest difference between Volvo and BMW suspension. With BMW, there is nothing extra. If one bolt is needed, that’s all they used. Compared to that minimalistic approach to engineering, Volvo went the opposite direction. I’ll explain. With the rear shocks, there is a bolt hole in the top where it mounts to the frame and a bolt hole in the bottom where it bolts to the rear trailing arm. Should be simple, right? W R O N G.

You see, Volvo used this incredibly stupid bolt I can only describe as a two-stage bolt for the top mount into the frame. A nut is threaded onto the bolt from the back, on the inner side of the frame rail, that goes through the frame rail to a 22mm ‘nut’ that is part of the bolt itself and sandwiched between the shock and the outer nut and washer on the bolt. The shock is bolted to itself for no reason and then bolted to the frame. WHY! Such a stupid design. If it is for additional space from the frame, why not just use a spacer like there is on the bolt inside the rear trailing arm? It doesn’t hamper movement to have it bolted to the frame itself, just use a washer if you’re that concerned. Why on God’s green Earth they would bolt the shock to itself is beyond me. Anyway, that was where my real struggle presented itself.
Because the old girl was untouched, this bolt had probably never been loose since before it was installed at the Volvo factory. Theoretically, if you were to undo the outer nut, you could take off the shock and leave the mounting stud in place, bolted to the frame with its silly sandwich design. However, 300 lb-ft of torque wouldn’t budge the outer nut of the driver’s side top mount. I had to take off the inner nut by hand since my impact wouldn’t reach up between the spare tire well and the frame, and use my breaker bar to hold the seized outer nut still. Fortunately, it worked. I was able to pull the shock from the car this way because it was so blown I could just depress it by hand, giving me enough clearance to pull it out, long bolt in place and all.

However, that was just step one. I still had to unstick it from the old shock to install the new one. Once again, my favorite two tools came in handy. With the breaker bar on the seized nut, and under my foot to stay in place thanks to all 215 pounds of my weight, my torch hovering just above it to get the nut glowing red, and a combination of box wrenches chained together on the 22mm hex part of the bolt, I pressed with all my might. A solid ten minutes of heating the nut to near melting and all the additional torque of breaker bars on breaker bars later, I successfully loosed the nut and bolt, effectively divorcing them.
With that side done and back in the car, I prepared for the same efforts to be needed on the passenger side. Fortunately, like with the tie rod end, that wasn’t the case. The outer nut came right off, leaving the mounting stud in place, and I quickly swapped the old shock out for a new Bilstein. I couldn’t quite understand why that was the case, though. Like with the tie rod end, all the parts were the same age. I don’t know why one side was simple and straight forward while the other was a complete nightmare. What’s more, the stuck tie rod end and the stuck shock bolt were on opposite corners of the car, so it wasn’t like one side had been more corroded than the other. It just didn’t make sense, which seems to be the running theme of this car.

Finally, it came time to bleed the brakes and get the old wagon out on the road for a test drive. Except, it wasn’t. I have bled brakes on many cars, mostly BMWs, but its the same procedure for everything. I first check to ensure the calipers aren’t mounted upside down, with the bleed screws at the top where they should be, and then I start at the rear passenger side (the wheel farthest from the master cylinder) and work my way up to the front of the car. Rear passenger, rear driver, front passenger, front driver. Throughout the process, I watched as plenty of old, gunky fluid spat from the bleeder valves along with gulps of air bubbles. I did this until no more bubbles came out of any bleeder valve, topped off the master cylinder reservoir with fresh fluid, set the car back down, and turned it on. Great! I had pedal pressure, everything felt good, and I was ready for a test drive. NOPE. As soon as I pulled out of my garage and I hit the brake pedal, it went straight to the floor. I quickly yanked the e-brake and stared in violent, frustrated, silence at the hole where the cluster was (that’s another story.)
So I carefully drove the car back in the garage, put it back up in the air, and went to bleed it again. Dribbles from the rear calipers this time, solid streams of fluid from the front. Not good. All I could think was that the master cylinder had given its last bit of life to the bleed and then quietly perished without so much as a whimper.
With that, all I could do for the weekend was just leave it in the air until I could bring home a pressure bleeder and new master cylinder today, hopeful that the car will see the road tonight for its first test drive with all new everything. Still, though, none of what I accomplished this weekend would have been possible were it not for my favorite tool: my problem solving, punishment loving, often slow to respond brain. That, and my blowtorch. Ideally, tonight will be the Volvo’s last night in the garage before I align in and deliver it to its eager owner, who has unequivocally been saved all this hassle by intelligently leaving it to someone with a masochistic streak.
Epilogue:
The cluster itself is a tangent I didn’t think fit with the suspension woes, but one worth noting as an afterthought. When I picked up this car, I was told the cluster had been replaced with one from an automatic wagon when the ODO stopped working. Unfortunately, this cluster’s ODO failed shortly after and had not been replaced. Not a big deal, I thought originally, as VDO clusters have common failures in their soft plastic gears. Having replaced many ODO gears in my time, I thought this would be one of the easier fixes on the old Volvo. Naturally, this was not the case.

I popped open the cluster, pulled out the speedo assembly, unbolted the ODO motor, and was greeted with exactly what I expected. Bits of disintegrated gears crumbled out, leaving little pieces of what can only be called boogers stuck in between the remaining gear teeth. I used a dental pick and some computer duster to clean it all out, installed the new gears from odometergears.com, and reassembled the cluster thinking that would be that. I put it in the car, plugged everything up, happily saw power come back to the unit, and set off to test it. No odometer activity. Confused, I pulled back into my garage, uninstalled the cluster again, and took it back apart to doublecheck my work. I had assembled it correctly. Everything was getting power, everything spun freely, but the motor wasn’t turning. I put power to the motor and it spun as it should. I looked at the wiring, it all seemed intact and fine. I checked for bad solders but found none. I was lost.
Fortunately, I knew just the man for the job. Ever tenacious, I did something that I suggest everyone does: consult an expert. My new friend Matt, who is a cluster expert and quite familiar with old VDO units, would know exactly what to do. I hit him up and told him everything I had tried and what I suspected to be the issue, but needed his acutely trained eyes to confirm it and possibly fix it. Sure enough, when I took it apart for him at his workshop, it only took a few minutes for him to dive a little deeper and find our culprit. A dead solder and chewed up wires. All I could see were the terminals on the motor and to the board, not the wires’ condition in between those two points. It turned out that they were destroyed underneath the gear unit, just out of sight unless the whole thing was taken apart by a very skilled set of hands. Matt had just those hands and quickly replaced the wires with new ones, new terminals, and repaired the dead solder. This effectively saved my wallet about $400 for a new unit and proves yet again that you don’t have to have all the answers yourself. All you need is the humility to ask for help and the knowledge of how you need to ask. Hopefully, once I get the Volvo back on the road tonight, I will see a perfectly functioning cluster that represents all the stupid problems this car has had that it shouldn’t have. At least it won’t ever have them again after I’m finished with it.