
Introduction:
Part Number: ES#2561372
Tight Fit?
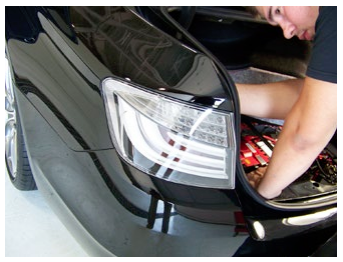
Installing White Line custom tail lights in a BMW F10 535i is a low tech project; no special tools, custom wiring, or body mods are required. The White Line lights are direct fit, plug-andplay assemblies. Unbolt and unplug the old lights, reversing the process to install the four clear-lens light fixtures. Access to the fasteners and electrical connectors is limited. They are well hidden inside the quarter panel behind the trunk liner. While it is possible to squeeze a small hand between the inner fender liner and quarter panel, it is a very tight fit. And if you don’t already know the exact location of the attachment nuts, you’ll end up playing go-fish until you track them down by feel. There’s also an element of danger in doing this “by feel”: there are very sharp stamped metal edges hiding in the darkness to bite an unsuspecting hand that wanders into the wrong space. We repeat: VERY SHARP edges. That’s why we’ll take the time to remove several inner panels and open up the work area inside the trunk. Then you can see what you’re doing. We hope you’ll agree that it’s worth the added effort.
Kit Contents and Tools
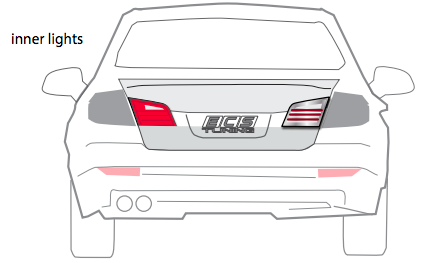
Your tail light kit comes with four complete light assemblies: two for the quarter panel tail light locations and two more to extend the lights into the trunk deck lid. All assemblies come as complete installation kits that include mounting hardware, body seals and bulbs, already installed. Let’s dive in.

Installation:
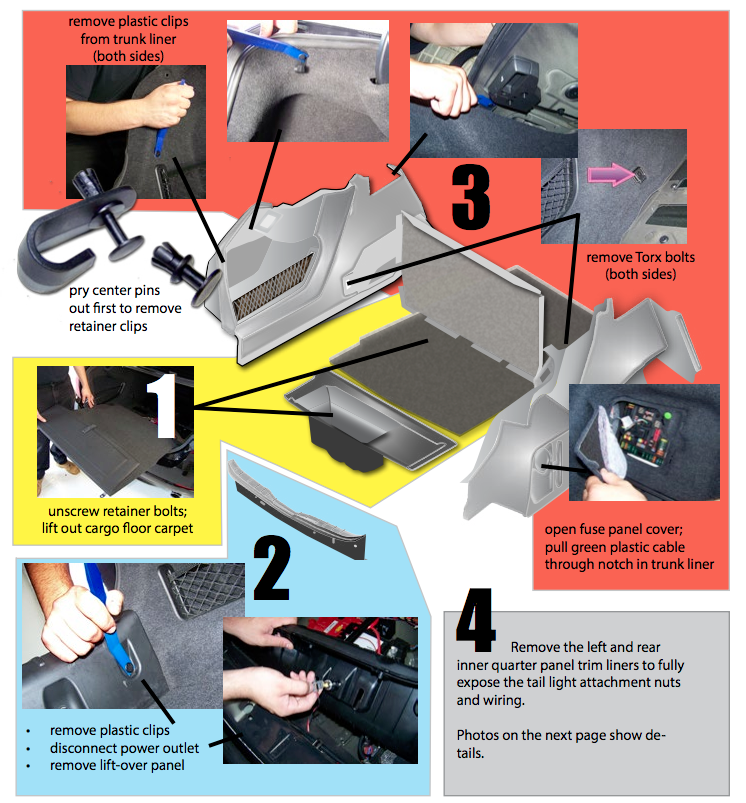
Remove the Trunk Inner Liner. To access the tail light attachment nuts, we need to pull back the trunk liner from the inside of the quarter panels. The gray carpeted liner is held in place by several clips, by the rear inside lift-over trim panel, and by the two trunk floor panels. Removing these panels is not especially difficult, and takes about 10 minutes. It will take longer to explain the process than to do it!

This overhead view shows the general location of the interior trim panels we will remove.
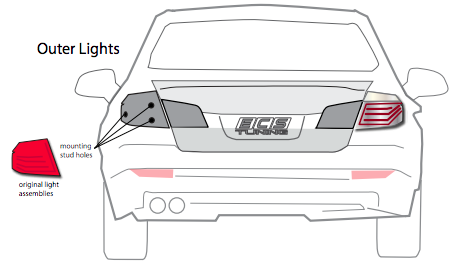
Installing the quarter panel (outer) light assemblies
Unbolt the old lights Reach around and unbolt the light housings. Use a deep well socket to unscrew the three retaining nuts.
Mounting stud locations. This photo shows the location of the mounting studs. The triangular support bracket may have very sharp edges.

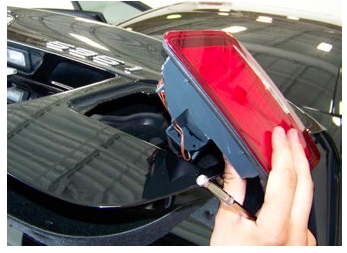
Remove the old lights Unplug and remove the light assembly.

Install the new lights Slide the new tail light assemblies into the body, inserting the three threaded studs on the light into the mounting holes in the sheet metal.
Tighten the lights Install the retaining nuts and hand tighten. (Do not over-tighten the nuts or you will damage the lights.) Plug in the electrical connector. Repeat this process at the opposite side light. Test light operation and reinstall the trunk trim panels removed.
Installing the deck lid (inner) light assemblies
Remove the deck lid liner attachment screws Unscrew and remove the deck lid inner liner attachment screws (arrows). Pull down the rear edge of the trunk liner

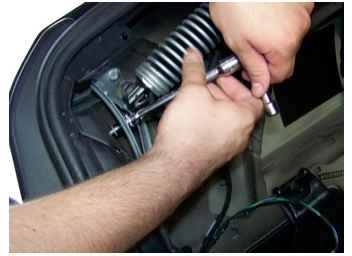
Unbolt the lights Using a 10mm socket, remove the light assembly retaining nut.

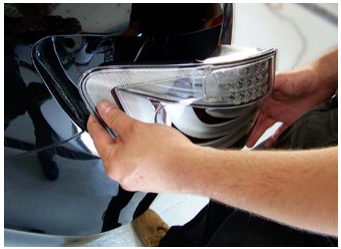
Remove the old the light Push upward on the inner edge of the old light assembly. Pivot the old light out of the mounting hole in the deck lid. Disconnect the old light.
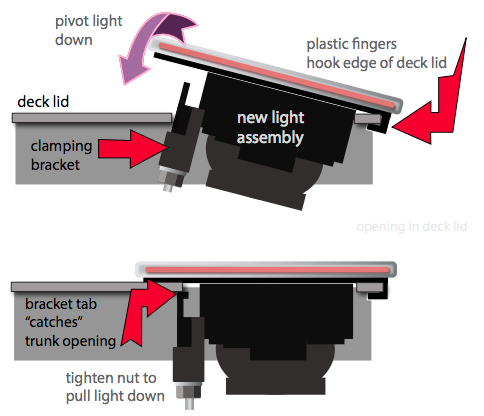
Install the new lights Now reverse the process to install the new lights.
• Loosen the nut on the clamping bracket as far as possible without letting it fall off.
• Hook the plastic fingers of the light assembly over the outer edge of the deck lid.
• Pivot the opposite side of the light downward until the plastic tabs on the clamping bracket catch at the edge of the opening in the deck lid.
• Tighten the clamping bracket nut until the light is pulled all the way down. Do not overtighten the nut.
• Plug in the electrical connector.
• Repeat these steps to install the opposite light assembly.
• Reinstall the deck lid trim screws.
This completes the installation of the White Line Tail light assemblies for the BMW F10.


