
Installing an ECS Tuning Performance Power Steering Pulley is an afternoon project that can be completed with relative ease. It rewards you with
the performance and dependability of our meticulously engineered products, and it is an excellent opportunity to replace worn drive belts at the
same time. Before you begin, read and familiarize yourself with these instructions and make sure you have all the required tools on hand. Thank
you for purchasing our ECS Tuning Performance Power Steering Pulley. We appreciate your business!
Inspect your serpentine and air conditioning belts before beginning this installation (see page 11 step 10). If they need to be replaced, be
sure to order them so you have everything you need to complete the job. Belts for your application are available at ecstuning.com.
Step 1:
Safely lift and support your vehicle and remove any lower insulation panels or
skid plates that are installed on your car.

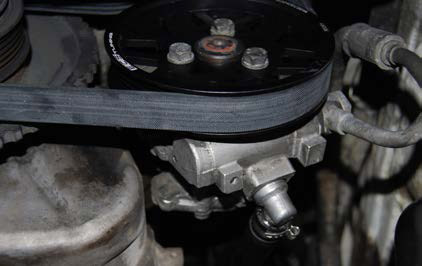
Begin by loosening the three bolts (arrows) on the original power steering
pulley using a 13mm socket. Do not remove the bolts at this time.
Leaving the belt on for this step will help hold the pulley to keep it from
turning while loosening the bolts. If it does slip a little, you will be able to
hold it with your hand as needed to loosen the bolts.
Step 2:
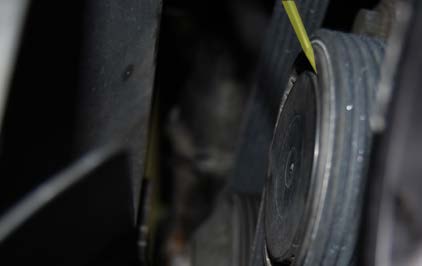
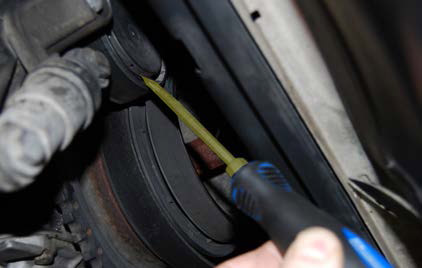
Using a small flat blade screwdriver, pry off the dust cap on the serpentine
belt tensioner pulley.
Step 3:
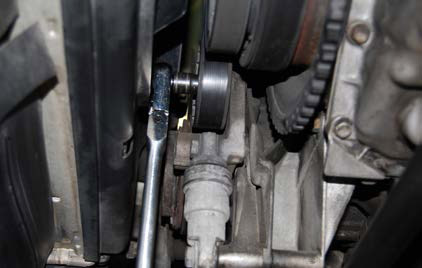
Engage the center bolt of the serpentine belt tensioner pulley using the
appropriate socket (see note below) on the end of a long handle 3/8” ratchet
or breaker bar.

Depending on model year and engine, the center bolt of the tensioner
will require either a 3/8 drive 16mm shallow socket or an 8mm Allen
socket.
Step 4:
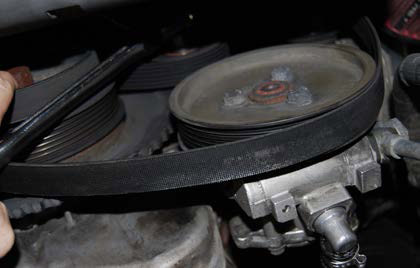
Push the ratchet towards the passenger side of the car, which will cause the
tensioner to swing downwards, loosening the tension on the belt. As soon
as there is enough slack in the belt, lift it off the power steering pulley, then
slowly allow the tensioner to swing back up to its rest position. Position the
belt out of the way above the power steering pulley.
Step 5:
Remove the three power steering pulley bolts (loosened in step one).
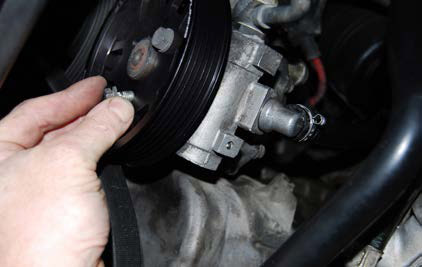
Step 6:
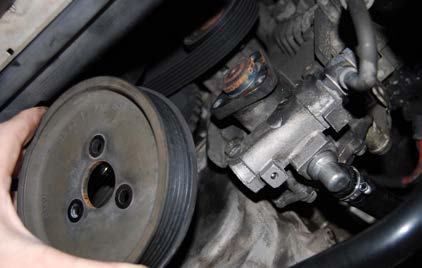
Remove the original pulley from the power steering pump.
If the pulley is stuck due to rust build up on the pulley hub, use a small
amount of penetrating oil and gently lever between the pulley and the
power steering pump to loosen and remove it.

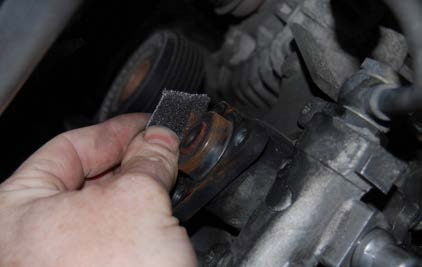
Step 7:
Clean the rust and corrosion buildup from the pulley hub using a small piece
of sandpaper or emery cloth.
This is very important even if the original pulley was not rusted or stuck.
The new ECS Tuning pulley has a tighter tolerance and the hub must be
clean to prevent damage or distortion when tightening the bolts.
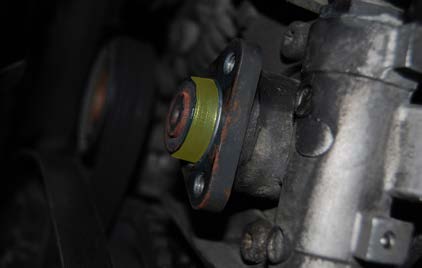
Step 8:
Apply a thin layer of grease to the pulley hub. This will allow for easier
installation and provide protection from corrosion between the hub and the
new pulley.
Step 9:
Install the new ECS Tuning Power Steering Pulley onto the pump and thread
all three bolts by hand until they are fully seated.
The pulley should easily slip all the way onto the hub, allowing for easy
installation of the bolts. If the pulley is difficult to install in any way, remove
it and check for rust or corrosion on the hub (see step seven).
Step 10:
Before proceeding read the following serpentine belt information:
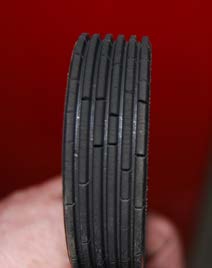
Worn Belt (L) and New Belt (R)

• If your new power steering pulley is an underdrive pulley, a shorter belt may
be required. Check the specific belt requirements at ecstuning.com and see
“Serpentine Belt Replacement”.
• If your new pulley is a standard drive pulley, closely check the condition of
your serpentine belt both visually and with a belt wear tester (ES#2642871).
Any cracks or wear on the ribs of the belt mean it should be replaced. For
replacement see “Serpentine Belt Replacement”.
If you are re-using the existing belt, continue with step 11.
Step 11:
Using the same method as used when removing the belt, swing the
serpentine belt tensioner downwards until there is enough slack in the
serpentine belt to loop it over the power steering pulley. Make sure the belt is
properly lined up on all the pulleys then allow the tensioner to swing back up
to tighten the belt.
Use a trouble light or flashlight to inspect the belt positioning on
all pulleys. If the serpentine belt is not properly aligned and seated
in each pulley, it may be damaged upon starting the engine.
Final Steps
Torque the power steering pulley bolts to 22 Nm (16 Ft-lbs)
Install the dust cap on the tensioner pulley.
Start the engine and make sure the belt runs true.
Re-install any lower insulation panels or skid plate.

Step 1: Belt Replacement
In order to replace the serpentine belt, the air conditioning compressor belt
must be removed. First, remove the dust cap on the air conditioning belt
tensioner.
Step 2:
Using an 8mm Allen socket and the same method used for releasing the
serpentine belt tension, swing the air conditioning belt tensioner downward
and remove the belt.
Step 3:
Carefully guide the serpentine belt around the radiator fan and out through
the top of the engine compartment.

Step 4:
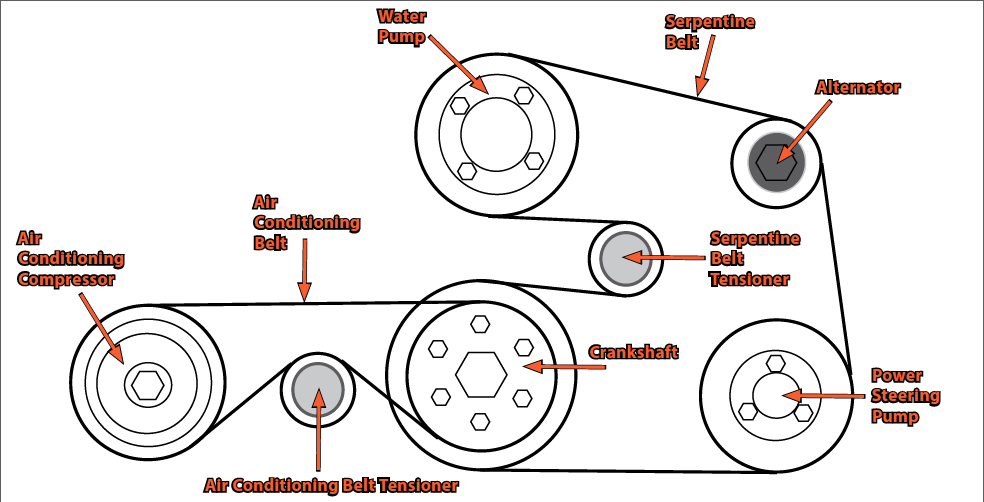
Guide the new belt back in place. Refer to page 6 for routing.
Re-install the air conditioning belt and pulley dust cap.
Complete the pulley installation on page 12.
Interested in purchasing?
ECS Tuning BMW M52/M54 Performance Power Steering Pulley Installation
Free up horsepower and service your drive belts with the highest quality aftermarket and replacement parts.


