Introduction:
Part Number: ES#205462
Installation:
There are 4 Torx-30 screws securing the engine cover in place. Three are easily accessible, with the rear left screw requiring some finesse to remove.

It is not necessary to fully remove the screws from the recesses in order to lift the engine cover out of the engine bay.

Depending on the manufacture date and options installed on your vehicle, you may notice oil cooler hoses in the front of the cylinder head. Removing or repositioning the oil cooler and hoses may make the project easier.
You will see in the cylinder head the two VANOS solenoid valves, the uppermost is the intake valve, the lowermost the exhaust valve.

A metal clip secures the electrical connection to the solenoid. Press it in while pulling the connector out away from the solenoid.

With the electrical harnesses removed, you must now decide what type of tool will place the 10mm socket on the bolt head while giving you room and leverage to torque it free.

We used a hinged socket wrench to easily remove the two bolts holding the solenoids in place. Whichever tool you choose, it should positively engage with the bolt to avoid stripping – you will be reusing them.

*One-half turn will be sufficient to loosen the bolt to hand tightness. Be very careful when removing the bolt; in the close quarters you are working in it is very easy to drop this crucial part into the casing for the camshaft chain drive, causing serious damage*
If lost, it will be necessary to replace this bolt with the exact OEM bolt. If a bolt is lost, and a non-OEM replacement is used, the VANOS solenoid will not be seated accurately; this will upset the dynamics of the entire VANOS mechanism, paralyzing the vehicle.

Before removing the valve itself, you may want to place a rag underneath the valve opening you will be exposing – VANOS is an oil routing mechanism; there may be some oil leakage.
Turn the valve 1/8th of a turn clockwise, and pull outwards. The valve will slide out with minimal e ort. If the valve is at all resistant, keep turning it slightly le and right until it is clear and can easily slide out.

If both solenoids are removed, you will not be able to differentiate the malfunctioning solenoid that is being replaced from the second reused solenoid by visual inspection. For this reason, it is imperative to organize the solenoids in your physical space such that they are not confused.
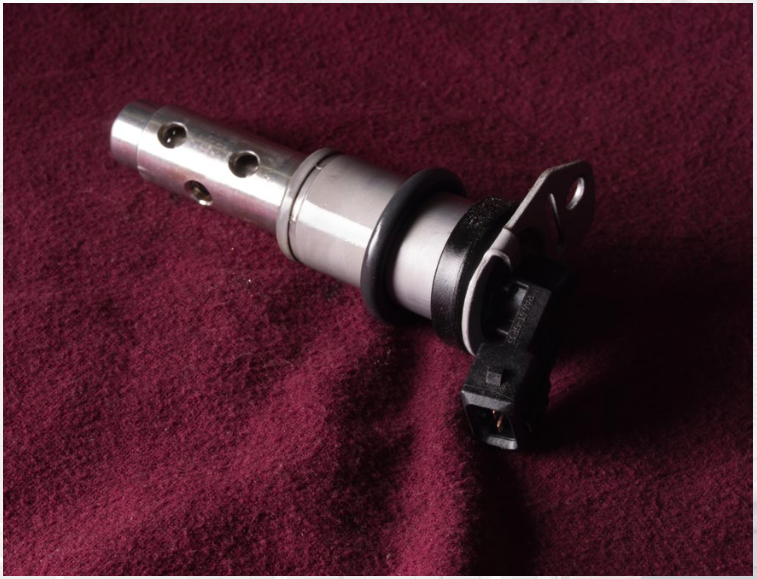
When reinstalling the VANOS solenoid valves, observe the orientation of the solenoid’s mounting bracket hole towards the mounting hole on the
cylinder head.
Insert the solenoid in through the hole so that the valve mounting bracket is 1/8 turn clockwise from the cylinder hole (the valve bracket should be just below the cylinder head hole).

The orientation of solenoid mounting bracket before installation shown above. Turn solenoid counter-clockwise until the bolt is aligned with the hole and the solenoid is fully inserted.
Rotate the valve counterclockwise 1/8 turn while carefully pressing it in securely against the engine. Carefully re-insert the valve bolts and torque to between 8 Nm (6 -lb) and 10 Nm (7.3 -lb).
Reconnect the electrical harnesses. It will not be at all difficult to determine which harness connects to the intake solenoid and which connects to the exhaust solenoid – the harness is zip-tied such that they will only reach their correct destination.

Once the engine cover is re-installed, start the engine. Use an OBD II diagnostic scanner to reset the problem codes. 2A87 and 2A82 should no longer be indicated.


