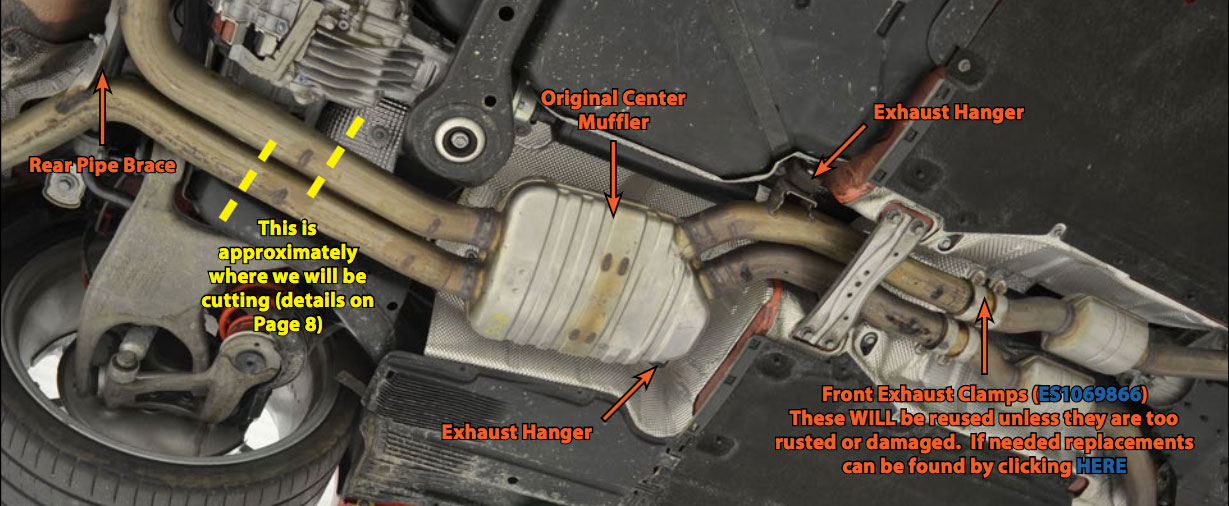
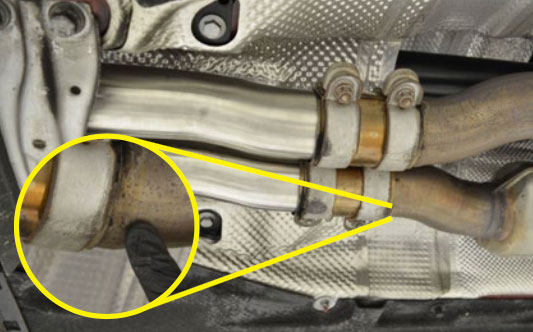
The photo above shows a few of the exhaust components we will be referring to during this install, so let’s take a moment and review what we will
be doing today. First, we will measure from the Rear Pipe Brace to the YELLOW lines and mark where the pipes will be cut. Then we’ll suspend the Rear Pipe Brace from the Rear Sway Bar (located directly above it), cut the pipes, remove the Exhaust Hangers, remove the Front Exhaust Clamps, and remove the original center muffler from the vehicle. Next we will need to clean up the pipes where we cut them with a metal file or a die grinder, then we’ll install the new X-Pipe into position using the original Front Exhaust Clamps (unless they are too rusted to reuse) and the included new Rear Exhaust Clamps, as well as the original Exhaust Hangers. To wrap things up we will adjust the X-Pipe so it does not come into contact with the vehicle chassis, then we’ll tighten everything down into position. Now, let’s continue to the next page for detailed instructions.
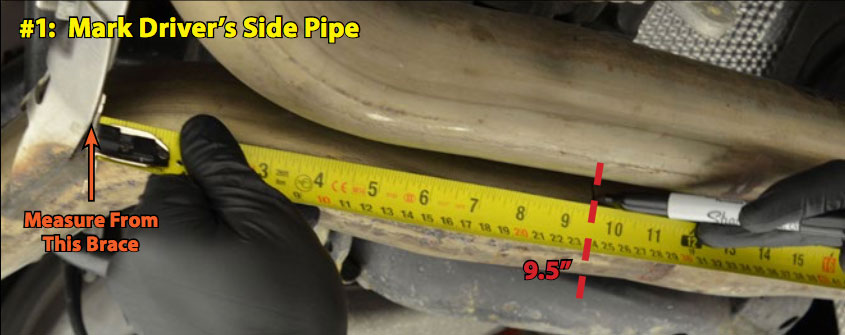
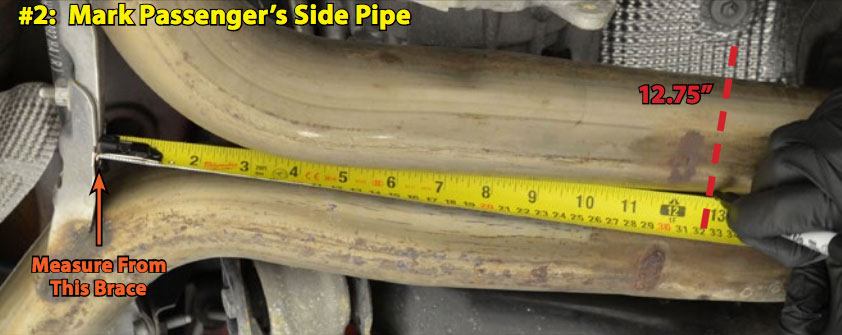
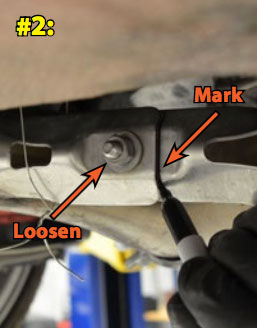
Measure 9.5” down the Driver’s Side exhaust pipe from the rear pipe brace, then mark the pipe with a permanent marker as shown in photo #1. Next, measure 12.75” down the Passenger’s Side exhaust pipe from the rear pipe brace, then mark the pipe with a permanent marker as shown in photo #2. Finally, extend the marks around the pipes so you will have a nice, straight line to reference while cutting the pipes. We wrapped masking tape around the pipe with the sticky side facing out to achieve this.

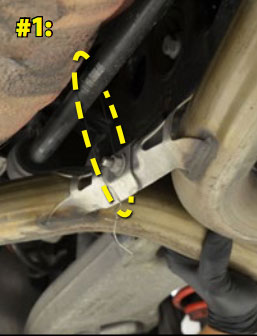
Suspend the rear pipe brace from the rear sway bar with a length of Mechanic’s Wire, then mark the brace with a permanent marker as shown in photo #2. Loosen the nut on the brace, but don’t completely remove it.
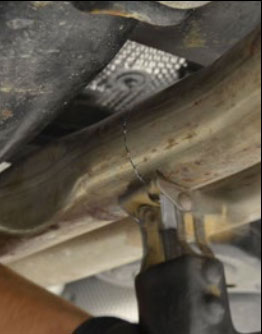
Cut the exhaust pipes along the lines we marked in step 1.

Remove the exhaust hangers from the exhaust pipe as shown in the photos.


Loosen the front clamps until they can be moved around freely, but leave them on the downpipes while removing the center muffler in the next step.

If the original clamps are too rusted to reuse, or they break during removal, replacement clamps can be found by clicking HERE.
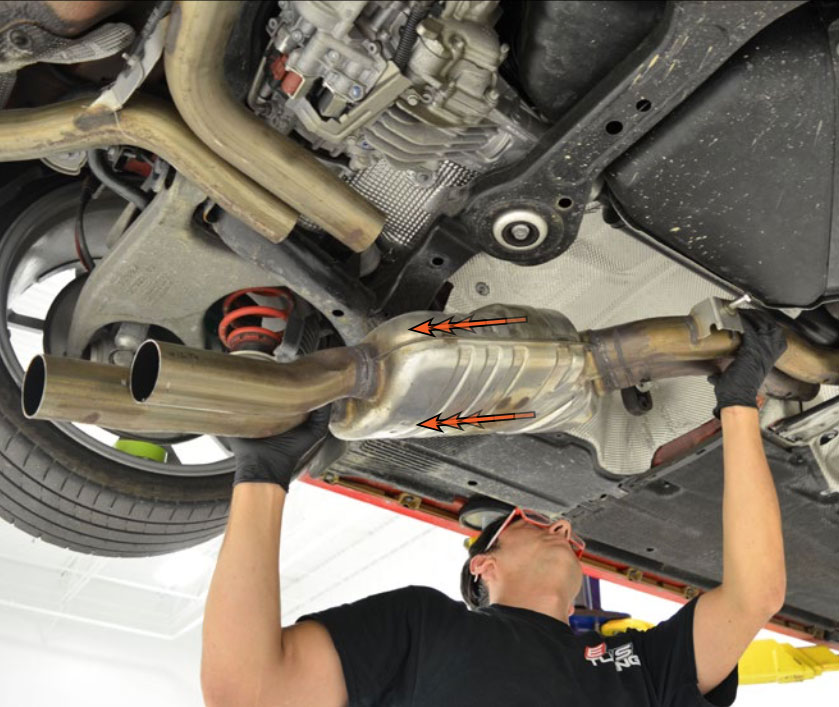
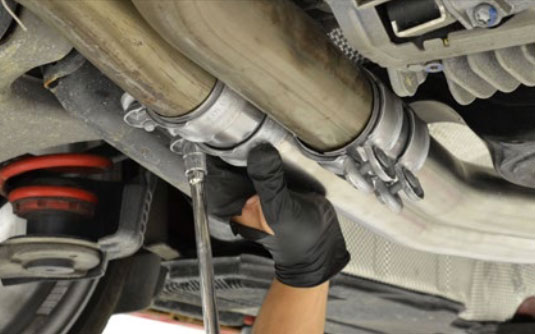
Remove the original center muffler from the vehicle by first lowering the rear, then sliding the entire unit down and out as shown in the photo.
Now is the perfect time to remove any burrs from the exhaust pipes, this will ensure a proper fit and seal once the new center X-Pipe is installed.

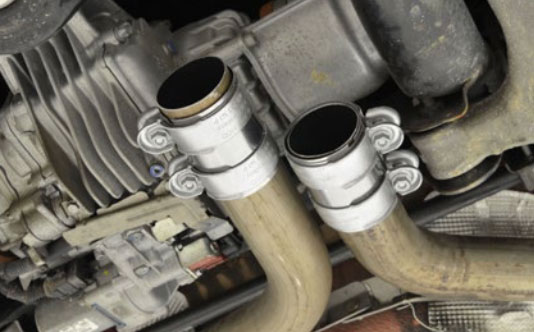
Slide the two new rear exhaust clamps over the rear exhaust section, making sure to leave the clamps with the nuts facing downwards and positioned on opposite sides of the pipes as shown in the photo below.
Lift the X-Pipe into position as shown
in photo #1. Guide the pipe over the chassis brace, then slide the front of the X-Pipe into the front exhaust clamps (not pictured). Install the exhaust hangers onto the X-Pipe to hold it in place as shown in photo #2.


Slide the original front exhaust clamps forward until they bottom out on the locating bump on the downpipes (shown in the photo below).
If the original clamps are too rusted to reuse, or they break during removal, replacement clamps can be found by clicking HERE.
Center the rear exhaust clamps between the X-Pipe and the rear exhaust section, then push upwards on the exhaust while tightening the clamp nuts until they are snug.
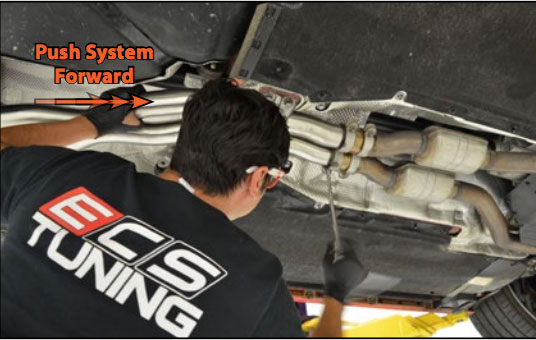
Push the X-Pipe towards the front of the vehicle while tightening the front exhaust clamp nuts until they are snug.
Closely inspect the entire length of the X-Pipe checking for any areas where the pipe the clamps may come into contact with the vehicle body or bracing, re-adjust if necessary.

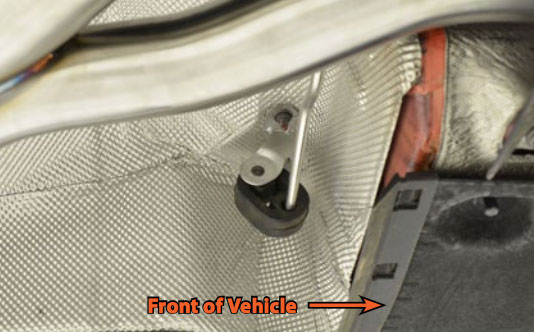
At least one of the exhaust hangers should rest as shown in the photo, tilted towards the front of the vehicle. This is NORMAL, the hangers will straighten out as the system heats up and expands.
One of the exhaust hangers will likely not be tilted as far as the one shown in the photo. This is NORMAL as long as at least one hanger is tilted forward, and the other hanger is at least straight up and down (vertical).
CAUTION: After approximately 500 miles, be sure to inspect the system for signs of leaks, and ensure that all of the clamps are tight.

Your Center X-Pipe installation is complete!
Interested in purchasing?
ECS Center X-Pipe for 2013+ Audi B8 RS5
Better sound, better flow, better performance; all with a quick and easy installation!