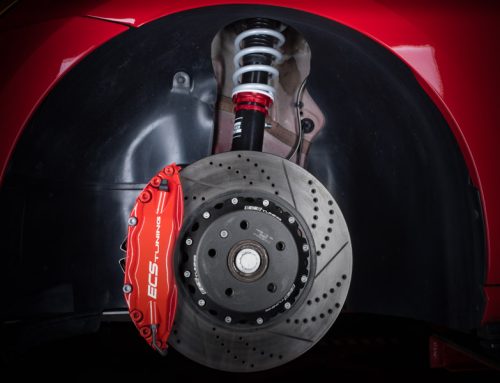
Introduction:
Part Number: ES#3176605


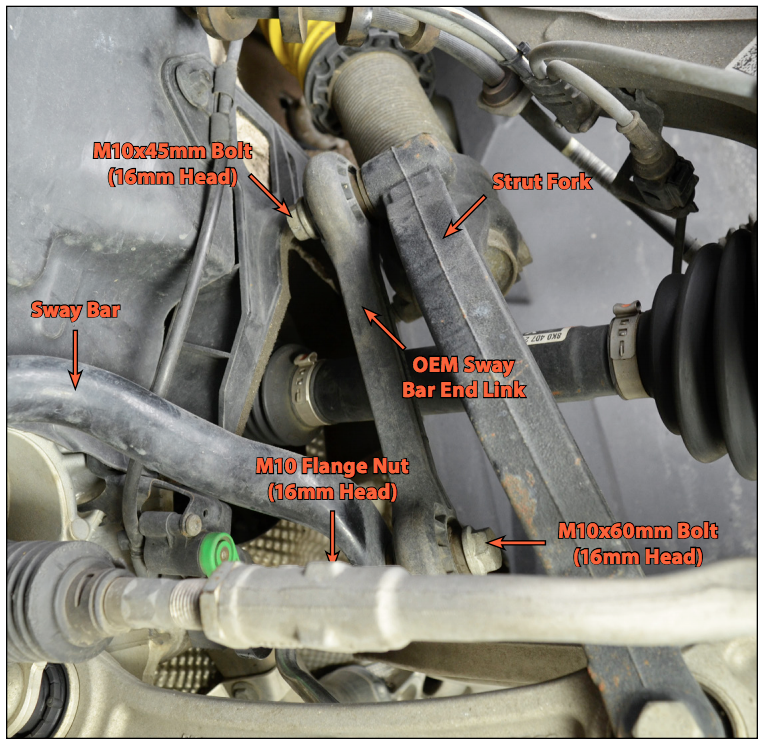
Component Identification:
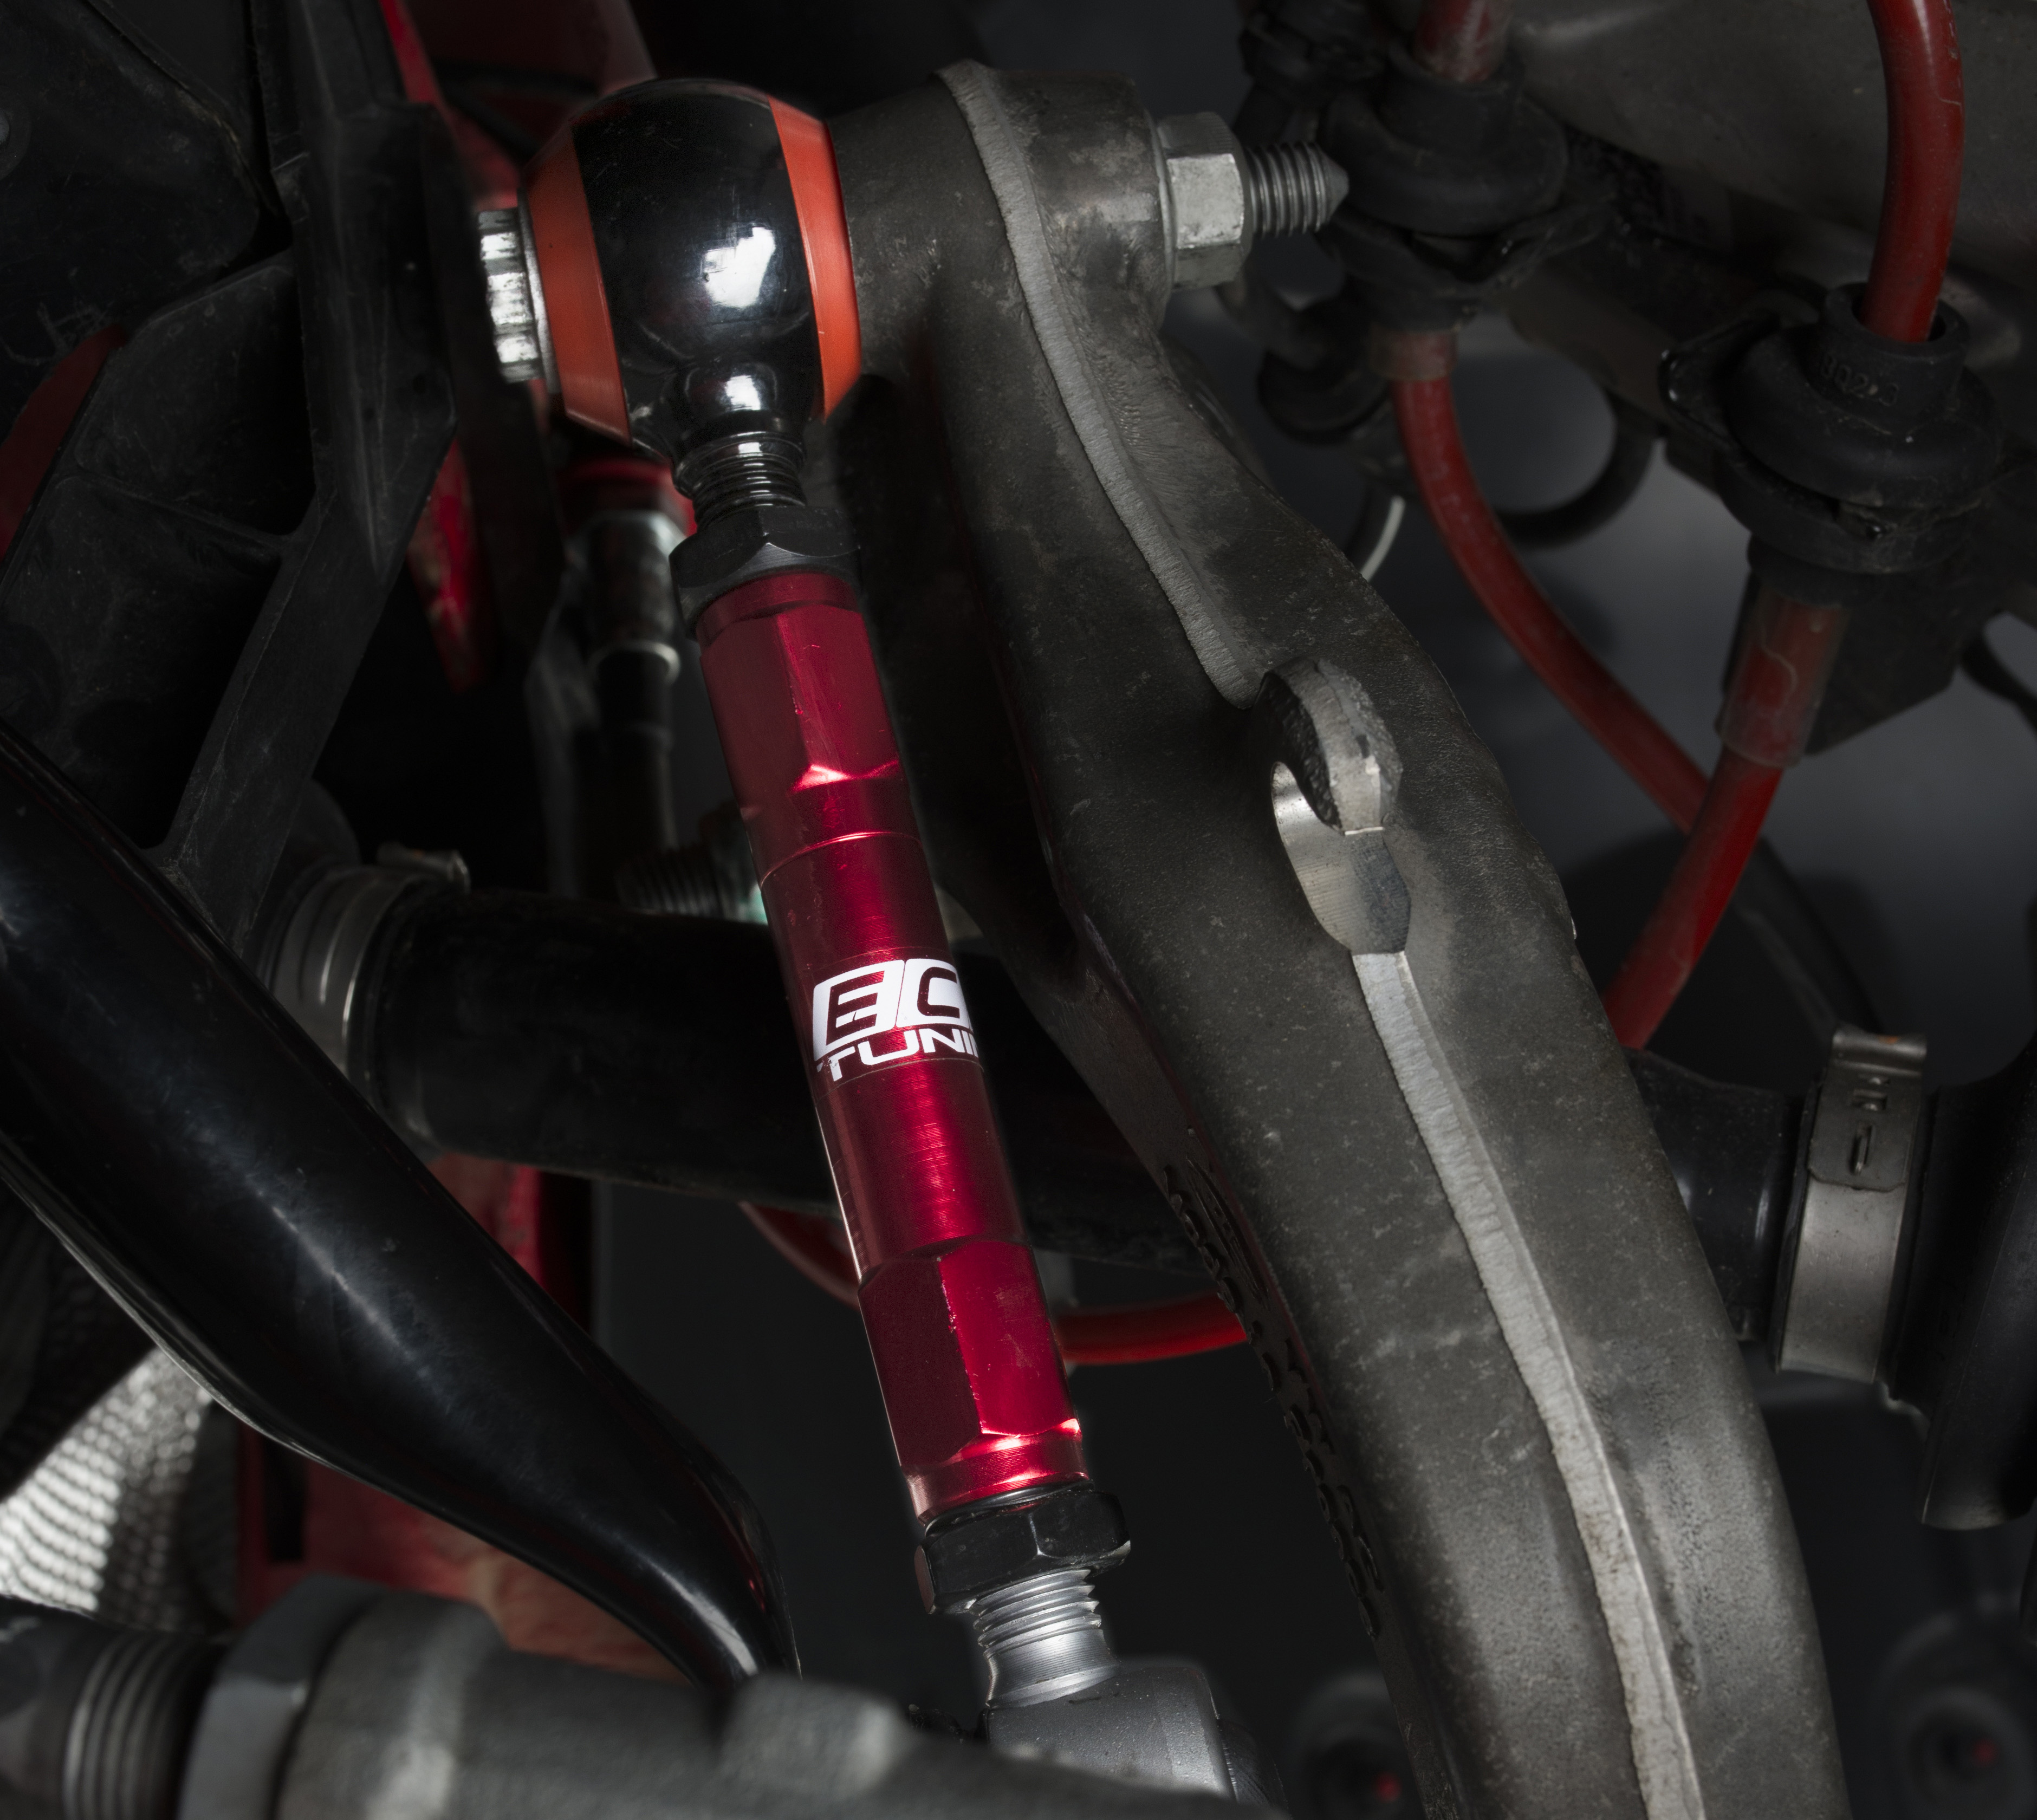
The ECS Tuning Adjustable Sway Bar End Link Set will install directly in place of the factory unit. The advantages of being able to adjust the length of your Sway Bar End Links include: • Allowing you to lower your vehicle without worrying about clearance issues between your sway bar and axles. • Allowing you to apply a “preload” on your sway bar, reducing overall body roll when turning. Please take a moment to look at the photo below and familiarize yourself with the components we will be referring to during this install.
Installation:
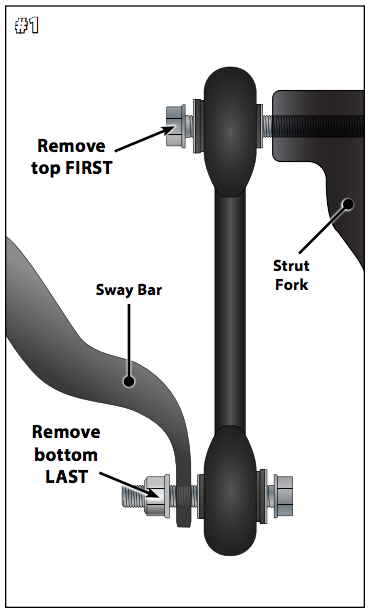
• Remove the M10x45mm bolt from the top of the End Link with a 16mm wrench, then pivot the end link down toward the front of the vehicle.
• Hold the M10x60mm bolt on the bottom of the End Link with a 16mm wrench while you loosen and remove the M10 Flange Nut with a 16mm socket and ratchet.
• Remove the End Link from the vehicle.
NOTE: The illustrations below depict the LH (Driver’s Side) of the vehicle, as it would appear from the front looking back. When installing the RH (Passenger’s Side) End Link, please remember that the images would be reversed.
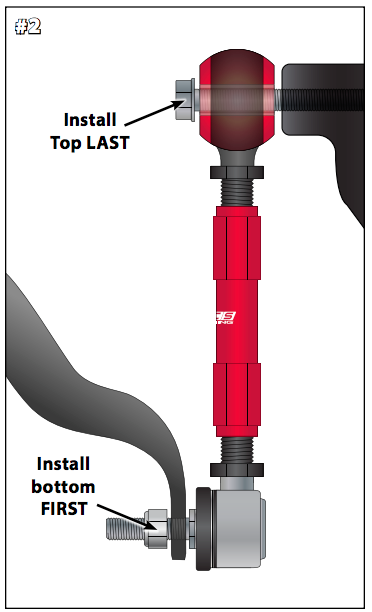
• Install the ball joint end of the new ECS Adjustable End Link through into the sway bar, then tighten the new M10 lock nut onto the stud until it makes contact (we will fully tighten this nut in a later step).
• Line up and install the M10 x 45mm bolt into the top of the End Link BY HAND. This can be a little tricky due to the rigidity of the urethane bushings inside the End Link.
• If you’re having trouble, try placing a jack under the lower ball joint and lifting the suspension upward slightly until the bolts threads in, or adjusting the length of the End Link.
• Tighten the M10 lock nut on the bottom of the End Link to 68 Nm, then tighten the M10x45mm bolt on the top of the End Link to 40 Nm + 90o.
Adjusting Your New ECS Sway Bar End Links:
• This illustration shows the minimum and maximum adjustment length of our Adjustable Sway Bar End Links. If you extend the links beyond 205mm, the thread engagement will be inadequate which can cause premature failure.
• Be sure to measure the length of the End Links from the CENTER of the bushing to the CENTER of the ball joint end as shown in the illustration below.
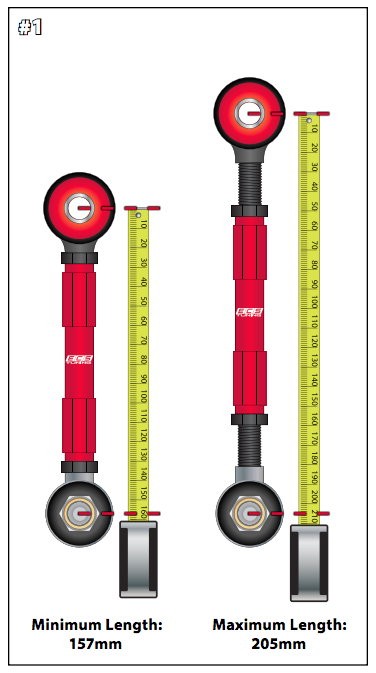
• Measure and adjust the length of your new End Links so that both sides are the same.
• Begin by fully threading in the two ends of the End Link so it is completely collapsed.
• Use a 17mm wrench to turn the center sleeve for adjustment.
• Adjust the other End Link so that they are the exact same length.
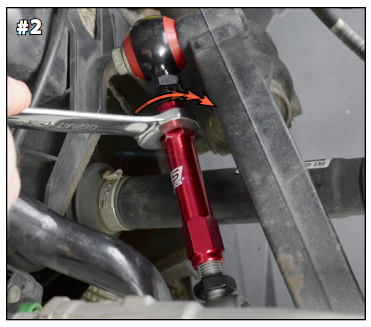
• Once the length has been adjusted, hold the center sleeve in place while you tighten the jam nuts with a 19mm wrench.