Introduction:
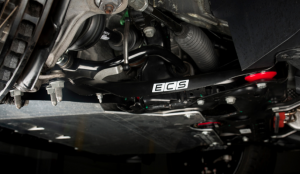
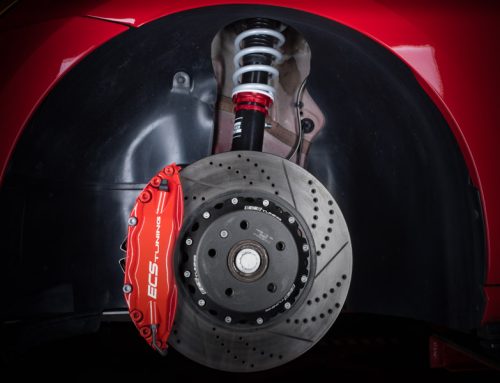
Today we are going to install our upgraded Performance Lower Control Arm Kit w/Polyurethane Bushings into our MK7 GTI. The ECS polyurethane bushings come pre-installed in new control arms, making for a very easy install. Upgrading to polyurethane offers many improvements over the stock rubber bushings by supplying enhanced road feel, improved traction, and longer lasting operation, all while operating squeak-free and with street friendly comfort.
The ECS Difficulty Gauge is reading just above “2 – Moderate”. Normally only basic skills and tools are required for a job like this, but the slightly higher rating is due to the nature of polyurethane bushings. They are extremely rigid and when it comes time to align the control arm with the subframe the polyurethane can be a little unforgiving. But don’t worry, we’re going to lay out the entire install step-by-step for you, and you should be able to breeze right through this job.
NOTE:
The Performance Lower Control Arms are available in two different kits, one kit offers the control arms alone, and the other kit offers all of the required hardware. We HIGHLY RECOMMEND buying the kit WITH the hardware, this is due to the control arm bolts being “Torque to Yield” fasteners. This means that they will stretch when they are tightened to specification and cannot be reused. Please see Page 20 for information on this type of fastener.
If your vehicle is equipped with a DSG or Tiptronic transmission, you will need to unbolt the pendulum mount from the subframe and swing the engine forward to remove the LH control arm bolt.
Kit Contents:
Control Arms only:

Control Arms Complete Kit:

Required Tools:
• Protecta-Sockets (for lug nuts): ES#2221243
• 3⁄8” Drive Ratchet: ES#2765902
• 3⁄8” Drive Torque Wrench: ES#2221245
• 3⁄8” Drive Deep and Shallow Sockets: ES#2763772
• 3⁄8” Drive Extensions: ES#2804822
• Hydraulic Floor Jack: ES#240941
• Torx Drivers and Sockets: ES#11417/8
• 1⁄2” Drive Deep and Shallow Sockets: ES#2839106
• 1⁄2” Drive Ratchet
• 1⁄2” Drive Extensions
• 1⁄2” Drive Torque Wrench: ES#2221244
• 1⁄2” Drive Breaker Bar: ES#2776653
• Bench Mounted Vise
• Crows Foot Wrenches
• Hook and Pick Tool Set: ES#2778980
• 1⁄4” Drive Ratchet: ES#2823235
• 1⁄4” Drive Deep and Shallow Sockets: ES#2823235
• 1⁄4” Drive Extensions: ES#2823235
• Plier and Cutter Set: ES#2804496
• Flat and Phillips Screwdrivers: ES#2225921
• Jack Stands: ES#2763355
• Ball Pein Hammers
• Pry Bar Set: ES#1899378
• Electric/Cordless Drill
• Wire Strippers/Crimpers
• Drill Bits
• Punch and Chisel Set
• Hex Bit (Allen) Wrenches and Sockets: ES#11420
• Thread Repair Tools: ES#1306824
• Open/Boxed End Wrench Set: ES#2765907
Project Overview:
Control Arm Removal:
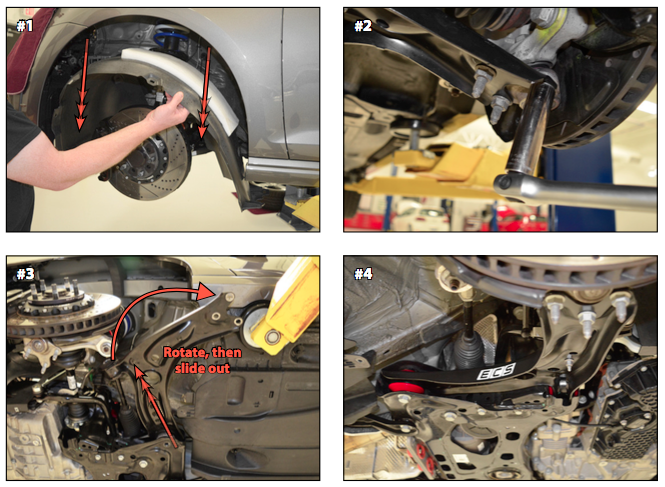
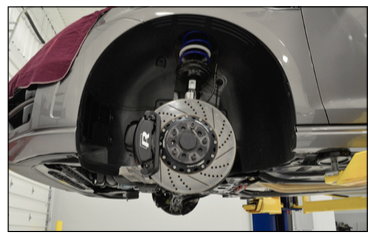
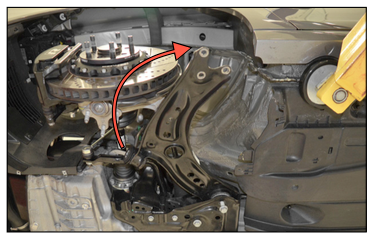
Let’s take a moment and look at what we’ll be removing in order to install the new Performance Control Arms. First, we’ll need to lift the vehicle and remove the insulation panel and the fender liner (#1), this is very important because we need to swing the control arm out pretty far to remove it, and the fender liner will be in the way. Next, we’ll disconnect the ball joint and remove the control arm bolts (#2), then we’ll swing the control arm out and around to slide it out (#3). Then we’ll reinstall the new control arm in reverse order, torque all of the fasteners to specification, and repeat this process on the other side of the vehicle (#4). Now let’s take a closer look at the fender liner.
Fender Liner Removal:
This illustration represents the LH (Driver’s) side fender liner, but the RH (Passenger’s) side fender liner is a mirror image of this one. As you can see there are 11 screws which secure the liner to the vehicle. Be sure to reference this diagram if you have trouble finding them all.
Now let’s get to it!

Installation:
Step 1:
T25 Torx
Safely raise and support the vehicle, then remove the insulation panel or skid plate, depending on what you have installed. The MK7 pictured here is equipped with the original lower insulation panel (highlighted in green).

Step 2:
T25 Torx
Remove the wheel, then remove the 11 fender liner screws as illustrated before.
NOTE: From this point forward we will only be working on one side of the vehicle, you may choose to install one side at a time or do them both simultaneously.
Step 3:
Pull the fender liner down and out of the wheel well.

Step 4:
16mm Socket & Breaker Bar
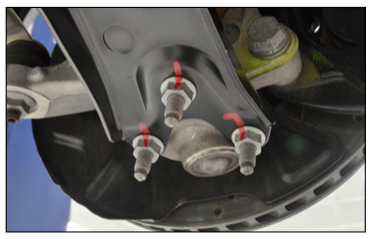
Remove the three nuts which secure the ball joint to the lower control arm.

TECH TIP: We highly recommend spraying the ball joint nuts with penetrating oil to aid in their removal.
Step 5:
10mm Socket & Ratchet, Pry Bar
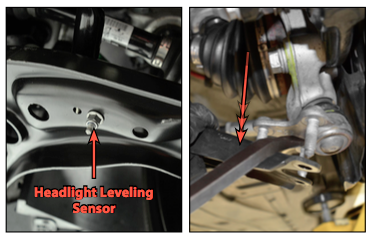
Remove the nut which secures the headlight leveling sensor bracket (LH if equipped), then pry the control arm off of the ball joint studs.
Step 6:
18mm Socket & Breaker Bar
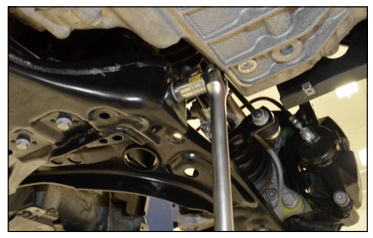
Remove the horizontal bolt which secures the front control arm bushing to the subframe.
NOTE: On vehicles equipped with a DSG or Tiptronic transmission, the LH horizontal bolt cannot be completely removed due to the location of the transmission. You will need to unbolt the pendulum or “dog bone” mount at the subframe and swing the engine forward, or in extreme cases, loosen and lower the subframe in order to remove the control arm bolt.
Step 7:
18mm Socket, Breaker Bar, & 18mm Wrench
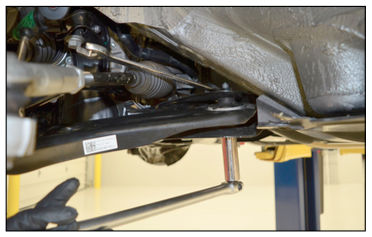
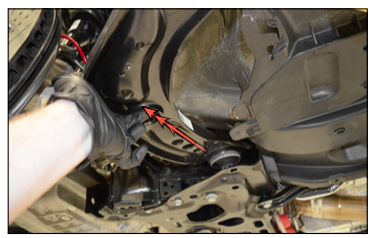
Loosen but DO NOT remove the vertical bolt and nut which secure the rear control arm bushing to the subframe, we will remove this hardware in a later step.
NOTE: You will have to hold the nut on top with a wrench while you loosen the bolt from below.
Step 8:
With the rear control arm bushing bolt loosened but still in place, pull the ball joint side of the control arm downward to clear the steering knuckle, then pull the front of the arm out of the subframe. Now, continue to the next page for further instructions.

Step 9:
Pivot the control arm as shown from the bolt we left in the rear bushing, this will give you the clearance you need to pull the arm out of the subframe.
Step 10:
Remove the vertical bolt and nut from the rear control arm bushing, then pull the arm out of the subframe.
Installing the New Control Arms:
Step 1:
Slide the new control arm into the subframe, then line up and hand tighten the vertical bolt and nut through the rear control arm bushing.
NOTE: We will be torquing these fasteners in a later step, leaving them loose now makes it easier to install the rest of the control arm.

Step 2:
Pivot the control arm back into position and slide it into the subframe, remember that you will need to pull the ball joint side of the control arm downward during this step to clear the steering knuckle. Line up the front control arm bushing and hand tighten the bolt.
NOTE: We will be torquing these fasteners in a later step, leaving them loose now makes it easier to install the rest of the control arm.

Step 3:
Install the ball joint into the control arm, then hand tighten the ball joint nuts.
NOTE: We will be torquing these fasteners in a later step, leaving them loose now makes it easier to install the rest of the control arm.

Step 4:
10mm Socket & Torque Wrench
Reinstall the headlight leveling sensor bracket (if equipped) and torque the nut to 14 Nm (10.3 Ft-lbs).

Step 5:
16mm Socket, Torque Wrench & Breaker Bar
Torque the ball joint nuts to 40 Nm (30 Ft-lbs), then rotate the nuts with a breaker bar an additional 45 degrees.
TECH TIP: As you can see, we marked each bolt with a paint marker after it was torqued down. This is an easy thing to do to ensure that none of the fasteners are forgotten or skipped.
Step 6:
18mm Socket, Torque Wrench & Breaker Bar
Torque both of the control arm bolts to 70 Nm (52 Ft-lbs), then rotate each of them with a breaker bar an additional 180 degrees.

Step 7:
T25 Torx, Protect-a Socket & Torque Wrench
Reinstall the fender liner and the wheel, then torque the wheel fasteners (factory spec is 120 Nm [89 Ft-lbs]).
Step 8:
Repeat this process on the opposite side of the vehicle, then reinstall the insulation panel or skid plate, depending on your application.

Torquing Tips:

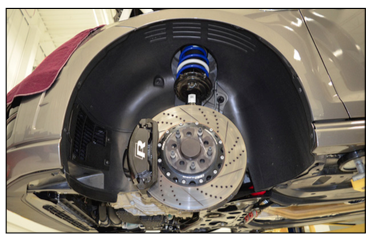
Your Performance Lower Control Arm Kit Installation is complete!
Interested in purchasing?
ECS Performance Front Control Arm Kit
Engage the road with precision, confidence, and reliability with our ECS Poly Control Arm Bushing Kit!